Simple, Stunning Sourdough - easy enough for kids, amazing result.
I have a friend named Will. I've written about him before. He is one of my dearest foodie friends. Some of my earliest memories of our friendship are when he would bring me a paper-wrapped parcel of warm sourdough goodness. On my front porch, he'd explain that he just had to share a chunk of his latest freshly baked bread. ...olive and garlic... cheese and herb... sun dried tomato...
Each time we tasted it our eyes would roll back into our heads. That wonderful, crusty exterior. The warm, flavorful inside. So I decided I had to learn. He was kind and shared some of his sourdough starter with me (which he'd practically started himself and kept alive for 15 years!)
Unfortunately, I am not a natural baker. I am too spontaneous,over confident and always think I can change and substitute. Well... with the sourdough recipe he gave me, I thought I'd try it without the bread flour since I didn't have any (can't make that big of difference, right?) and I didn't have a cast iron pot (so I figured I'd just use my stainless steel pot with a lid - same thing, I guessed). Did I let it rise for the correct time? I don't know. Seemed close enough...
It turned out like a big, dense flat brick. Totally inedible.
To my shame, I will admit that I left my sourdough starter in the fridge after that for months, untended. I kind of gave up.
An unfailing friend, Will kept bringing us tastes of his heavenly loaves. Eventually, I got the courage to ask him to teach me again. THIS TIME - I would patiently listen and do it RIGHT. Sadly, since I'd left the starter in the fridge for probably 6-8 months without feeding it - Will had to bring me a new batch.
I promised to be a better starter-keeper from then on.
I bought myself a simple cast iron dutch oven and was thrilled to get started. After that first loaf turned out amazing, I was hooked.
The rest is Sailer family history...
We bake a loaf (or some kind of sourdough product) at least every other day - sometimes every day. Garlic and rosemary loaves, cranberry apple cinnamon loaves, olive and scallion loaves, blueberry vanilla loaves, lemon zest and caper loaves ... new creations emerge every week.
There are several things that make this bread incredible.
- It really is easy. I know - I made it sound like it was complicated at first... but if you knew me - how easily distracted I am... you'd understand. Now that I'm in a rhythm, I can do it with my eyes closed. My kids bake it without my help now.
- It's the best kind of bread you can eat. Health-wise - sourdough is leaps and bounds above other breads. Because the wheat (or other grain) has fermented overnight with the aid of the cultured starter - the gluten and phytic acid in the grain has already begun to break down, making it easier to digest. In fact, another reason I was so motivated to try again - was because Emma (after having MRSA and taking some terrible antibiotics- before we knew any better) began to get stomach aches when she ate wheat. I learned that sourdough is easier to digest - and it is. She could eat the sourdough with no problems.
- It's affordable. Since I order my wheat and bread flour through a local co-op, my price for each loaf is literally pennies on the dollar. If you purchase organic flour at the grocery store and make it yourself, the price comes out to about 65 cents per loaf! It costs me time (which I love to generously spend on food) and saves me money.
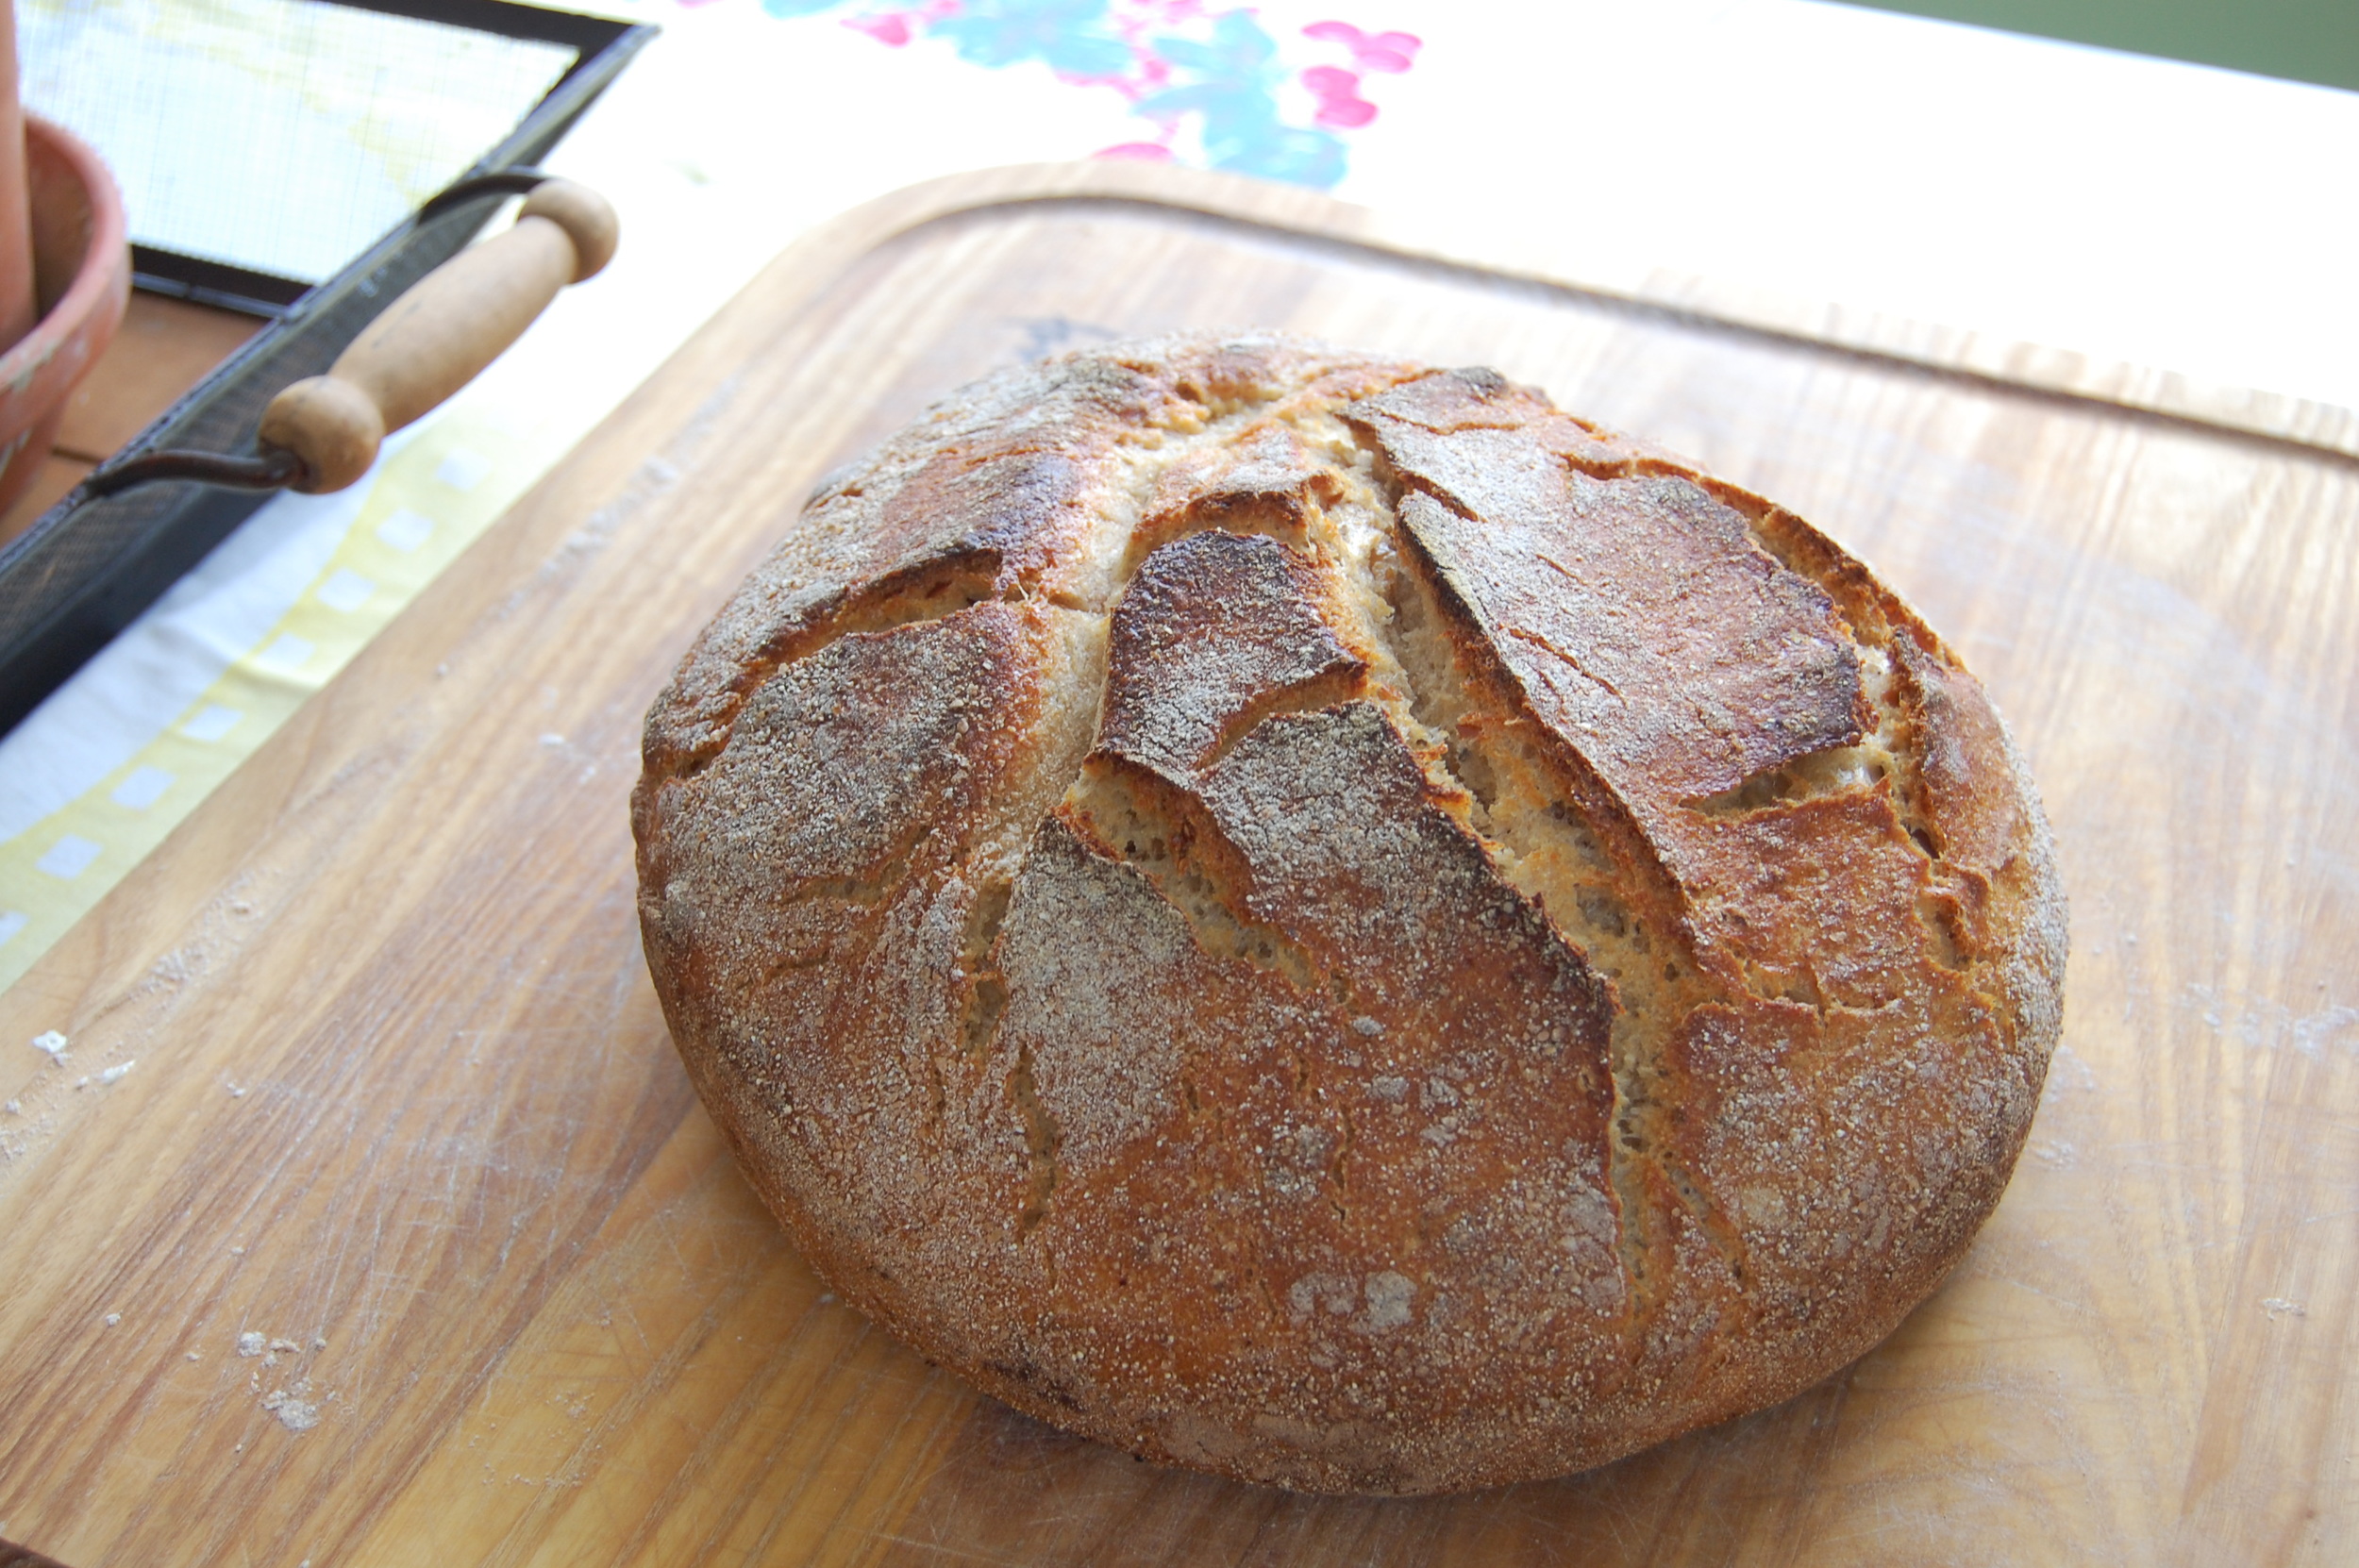
- It's stinkin' beautiful. I'm talking farmer's market beautiful. No... better. Europe beautiful. Did I mention to you that my friend Will learned how to bake while he was traveling through Greece? He lived there for awhile and learned from a bunch of cranky Greek men - sweating over an open bread oven. Are you ready to try this recipe yet?? Here's a photo to get you excited.
Really, even if you're a terrible baker, you can bake THIS at home:
I am going to give you a quick tutorial on how to bake this bread - but first, you will need a 4-6 quart cast iron pot with a lid (don't get one with enamel coating, unless it's safe up to 500 degrees). Will's pot was actually made of soap stone - but a cast iron pot works beautifully, since it holds in the heat close to the loaf and can get VERY hot..
Next you need to find some sourdough starter. Ask around in your local area. Anyone who bakes sourdough will have some that they can feed and share with you. You can order online (I've seen some dried starter for sale through www.culturesforhealth.com) or better yet - make your own! Here is a link for instructions. Anyone who lives in my local area (Northern Colorado) is welcome to contact me about getting some.
Once you have your pot and a source for sourdough starter - you can get started with these simple ingredients:
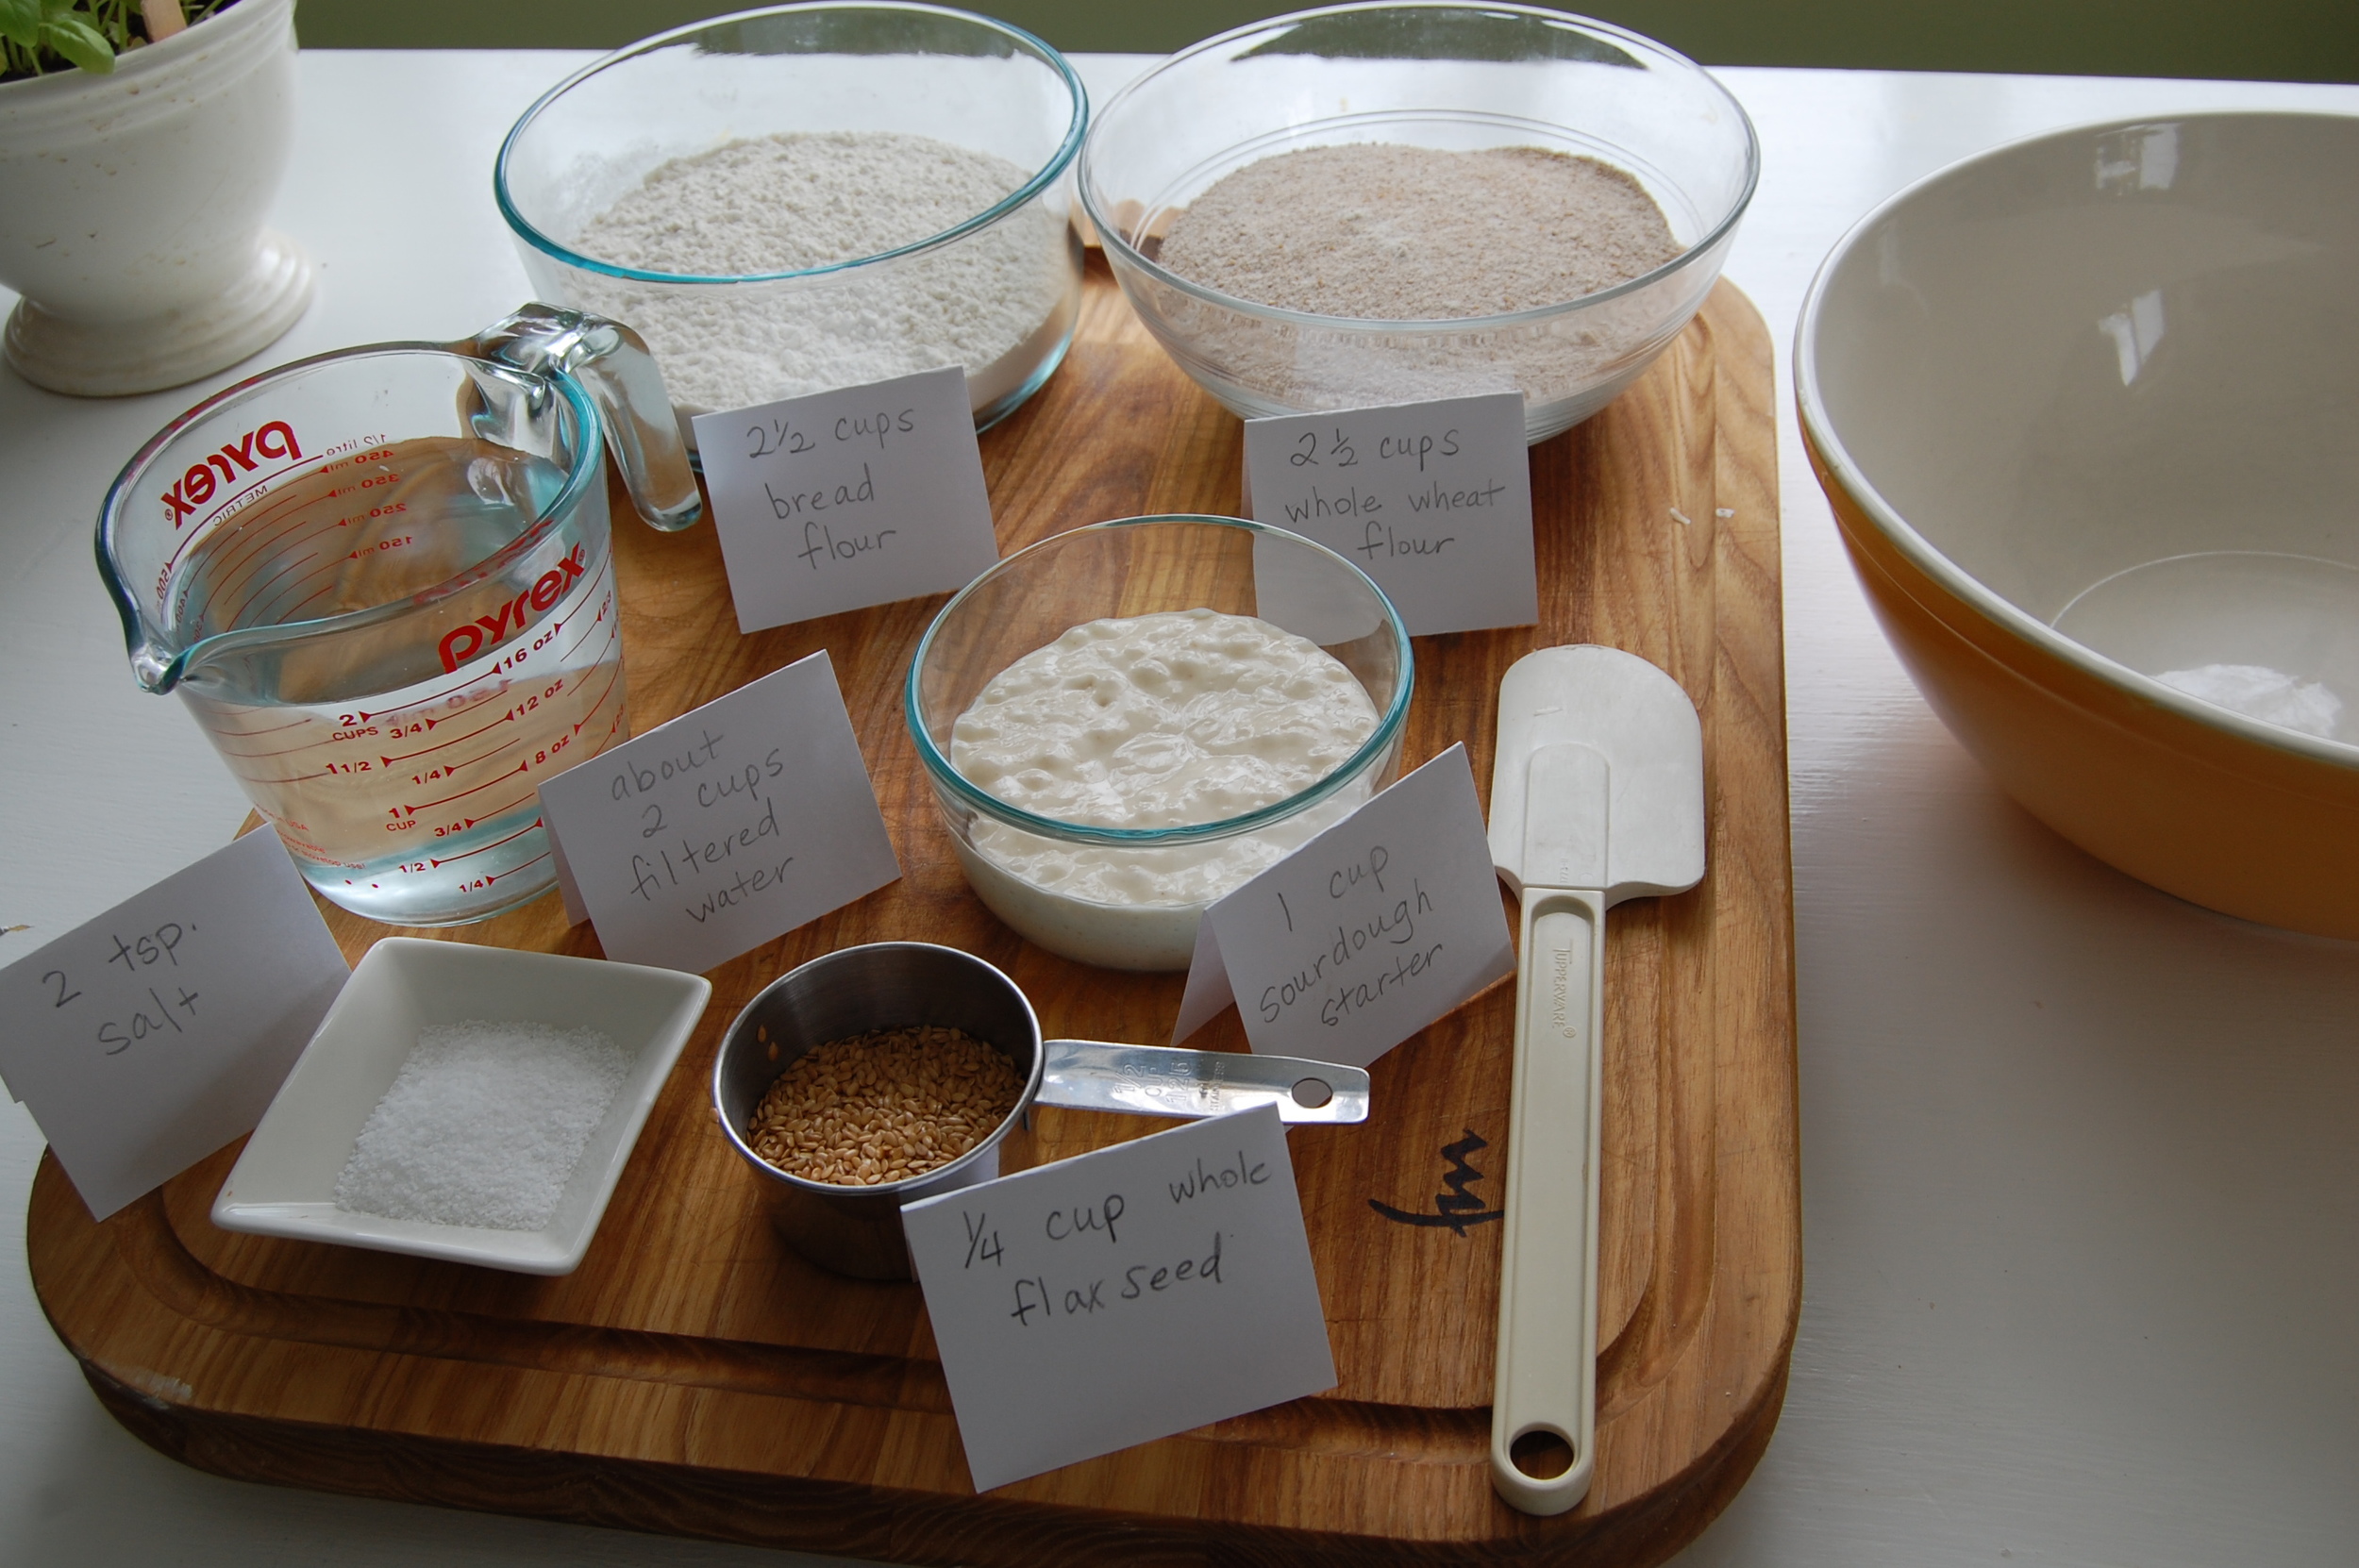
- Bread flour
- Whole wheat flour (or other - I use Kamut grain, spelt or other ancient grains work)
- Salt
- Filtered water
You'll need a sturdy spatula and I also recommend a pastry/dough scraper. This helps out a lot if you end up with a sticky and hard to handle loaf.
Let's begin.
I've adapted Will's original recipe to feed our family of 6, but you can make your loaf smaller if you like, by reducing the amounts (don't be scared, I do this all the time).
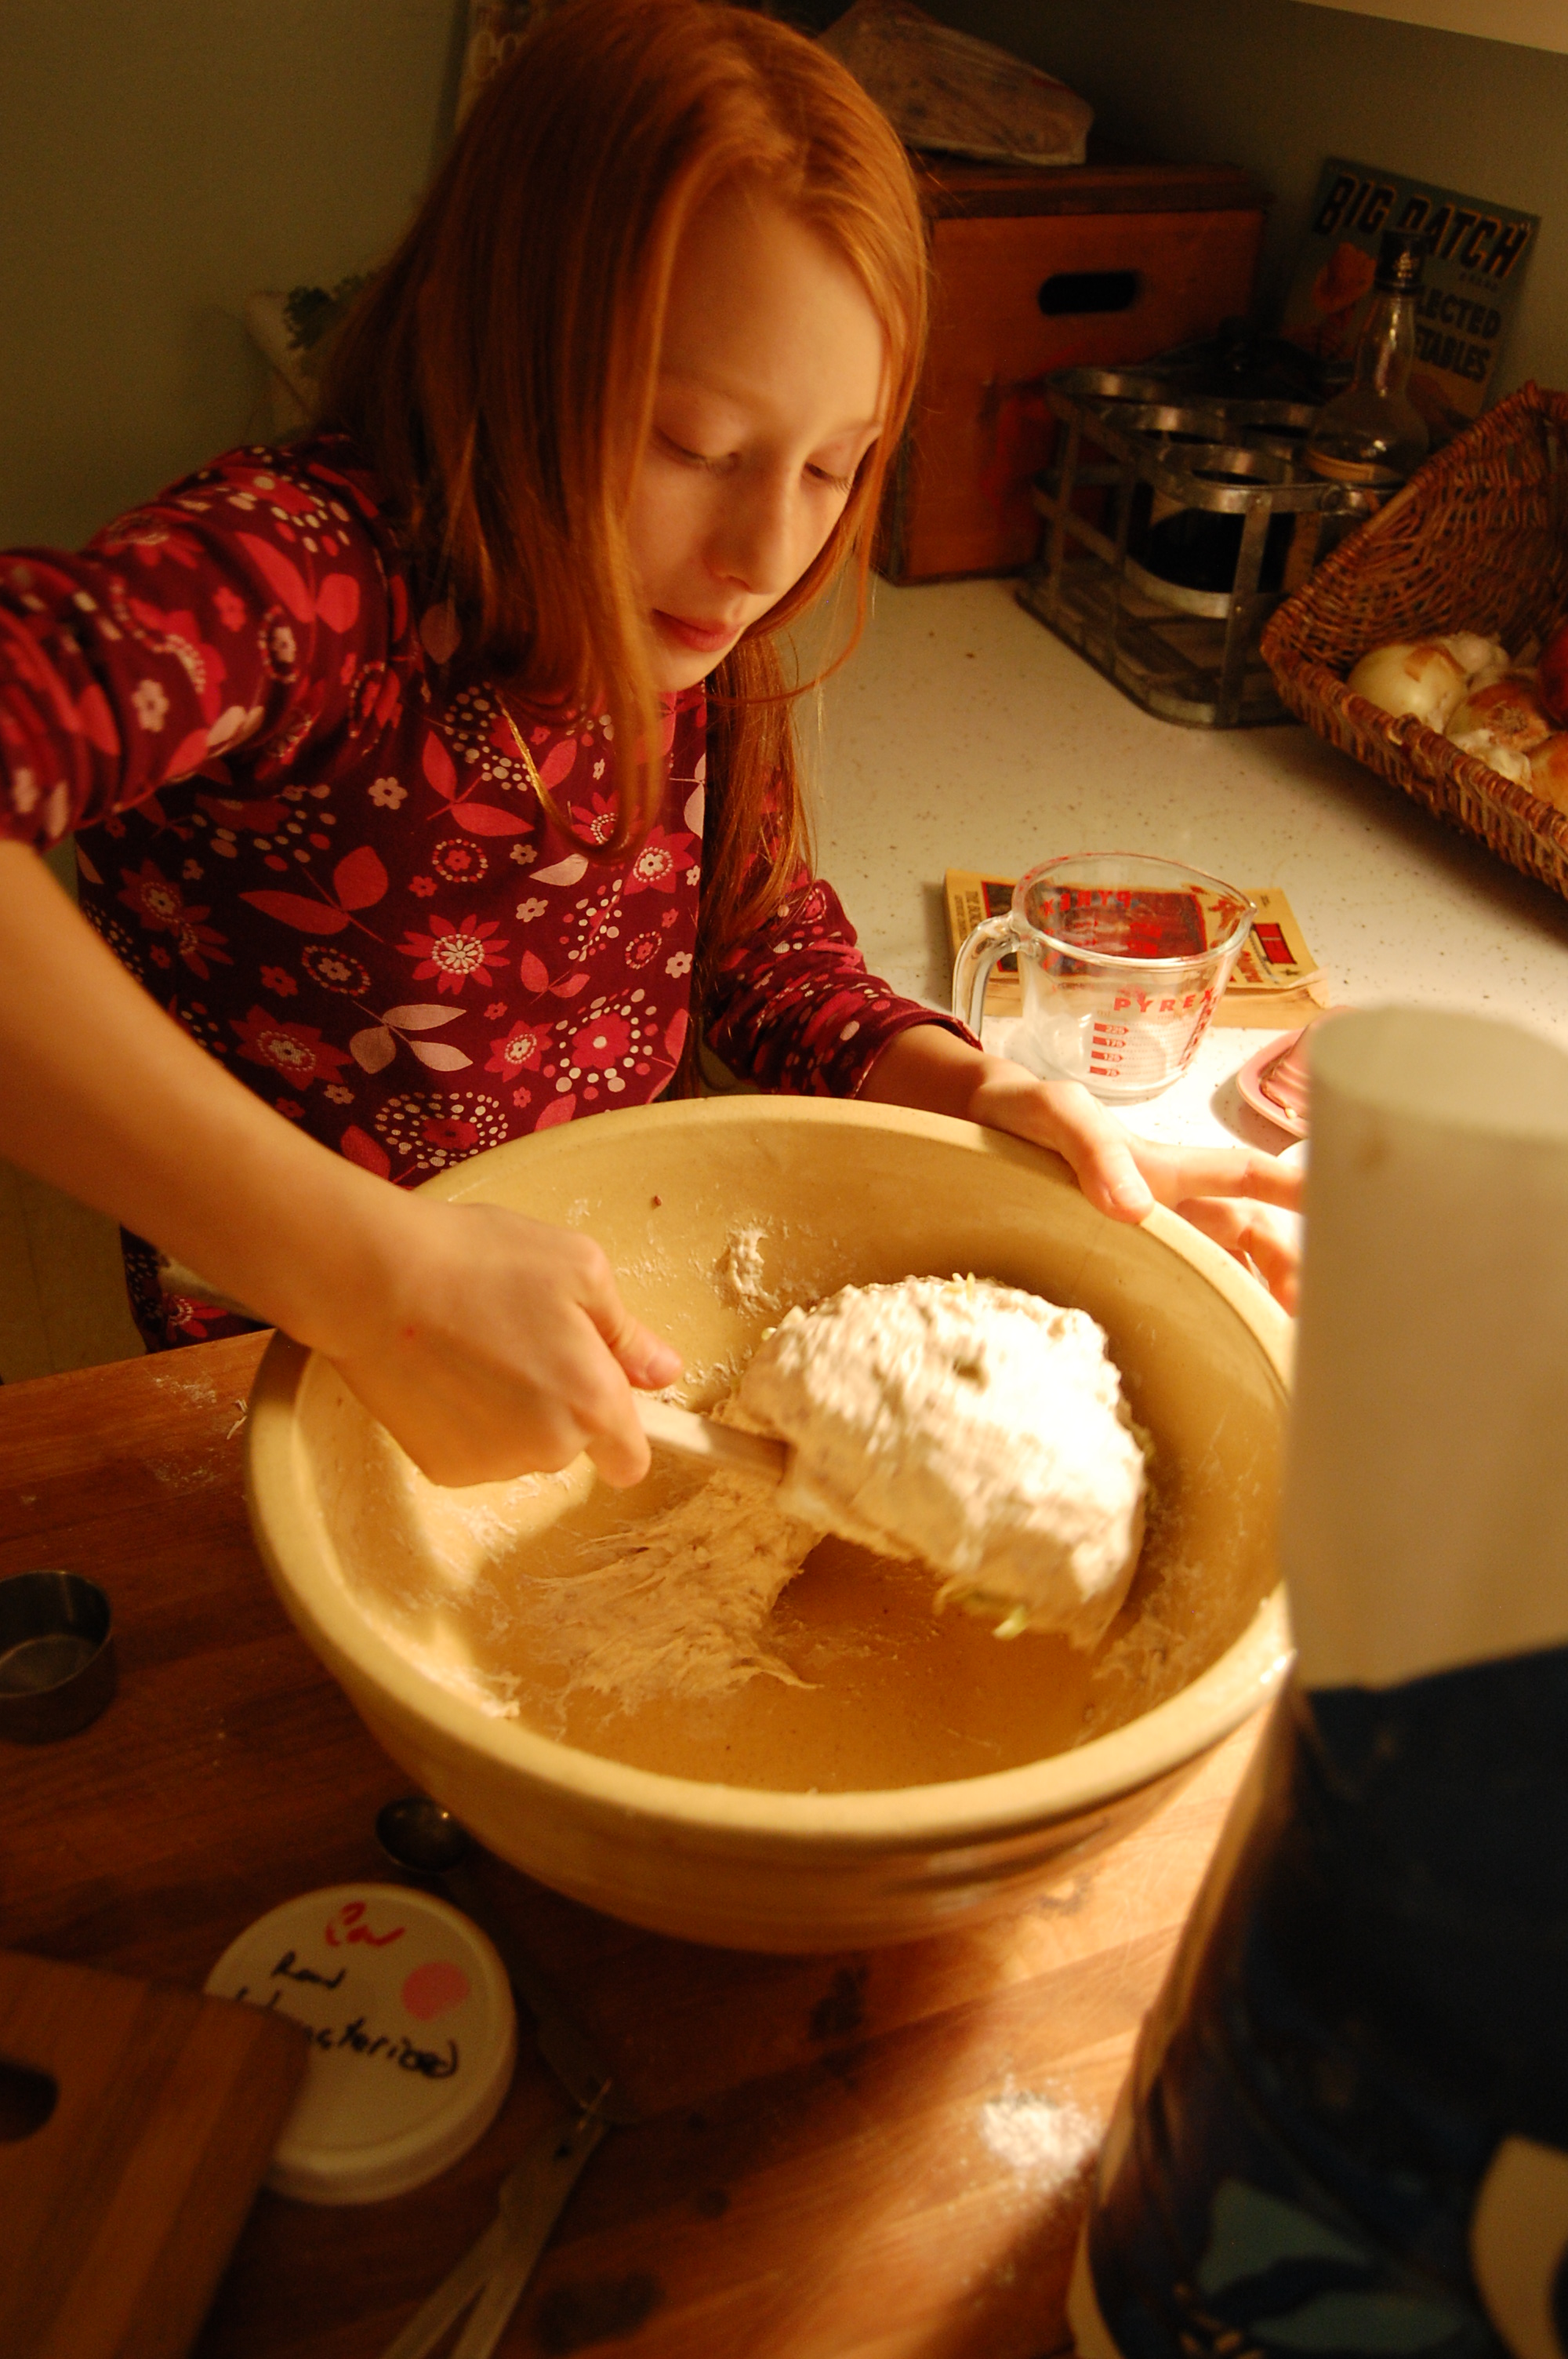
MIX YOUR DOUGH
In a large mixing bowl, combine:
2.5 cups organic bread flour
2.5 cups whole wheat flour (freshly ground is best)
1 cup sourdough starter
2 cups filtered water
1/4 cup whole flaxseed (optional)
2 tsp. salt
Mix these ingredients until well combined. I usually have to add a bit more water to get the consistency right - probably because I add in the whole flaxseed, which absorbs moisture. I like to add flax to every loaf - it's hardly noticeable, and even though the flour is fermented, I still rarely use white flour at home. The girls know why... "it sticks like glue to your gut!"... we say around here. I think it's important to keep even that easier to digest flour moving through ya.
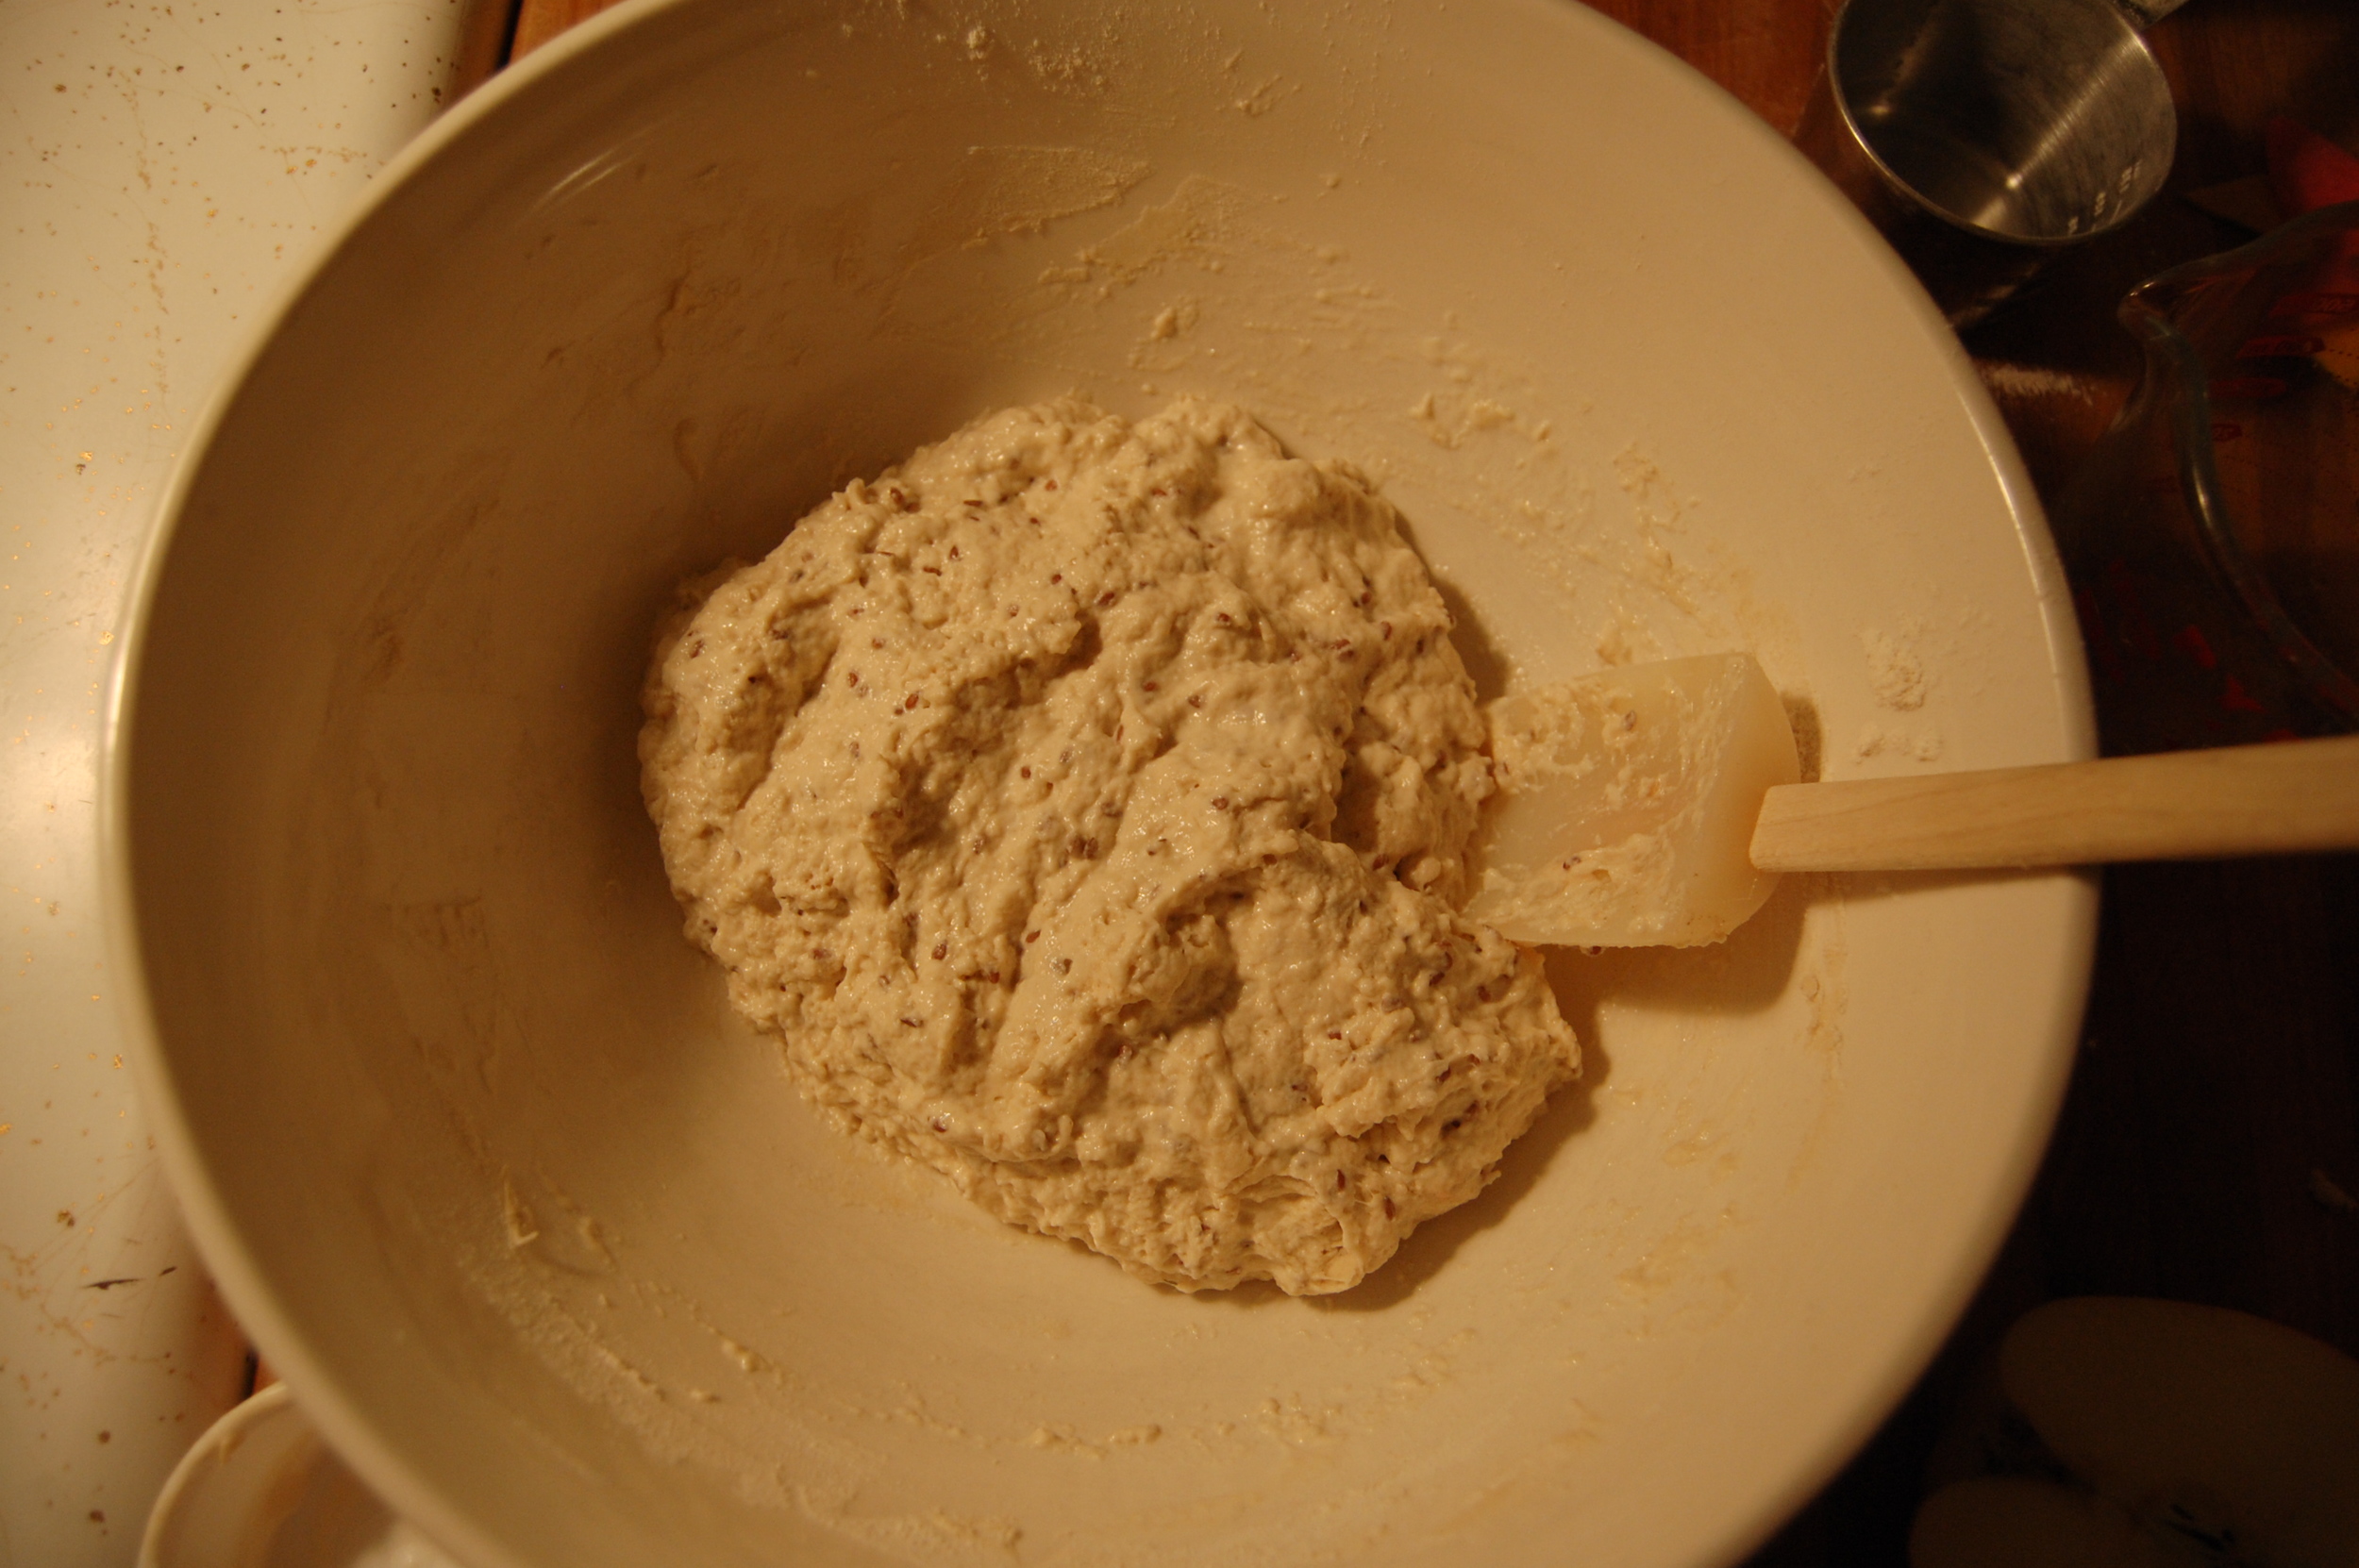
Cover your bowl with a tea towel and plate on top. This method makes it easy when you're ready to shape your loaf.
Before putting everything away - (this is very important!) - you MUST feed your starter. You see, your starter is alive - it needs attention. You don't have to be exact here, but I usually feed mine almost as much as I just took out. So - I'll give it just under a cup of flour. Then add in filtered water (not too much - just enough to bring it back to the same consistency that it was). Stir well, and cover loosely. Cultured foods do best kept in a dark place. I keep mine in a cupboard while I'm using it regularly. If it's out at room temperature - it needs to be fed no less than every other day. If you're not sure you can remember or want to bake that often - just keep it in the fridge. Then, when you want to use it - take it out, feed it and it will be ready to use the next day. As long as you take your starter out of the fridge once a month to feed it (let it bubble up for a day) it will stay alive!
Okay. Back to the loaf we are baking.
Let your loaf sit out and ferment at room temperature for 12-14 hours, undisturbed.
*You'll notice that the bread will rise quicker in the warmer months, and it will take longer when your kitchen is a bit cooler. The dough will rise in the bowl, and then deflate again if it has been allowed to ferment for too long. Watch your dough. It will work best when it's on it's way up... if it' has deflated (you'll see lots of bubbles that have burst and it will be very wet) you've waited too long. When this happens, I add more bread flour and let it ferment again. The dough at this point tastes more sour, but it can be made into English Muffins or flatbread.
To keep it simple - I've figured out that as long as I bake my sourdough in the evening - I'll be able to bake it the next morning or afternoon.
(NEXT DAY) - SHAPE LOAF
Dump your dough out onto a floured board or countertop, keeping it together as best you can.
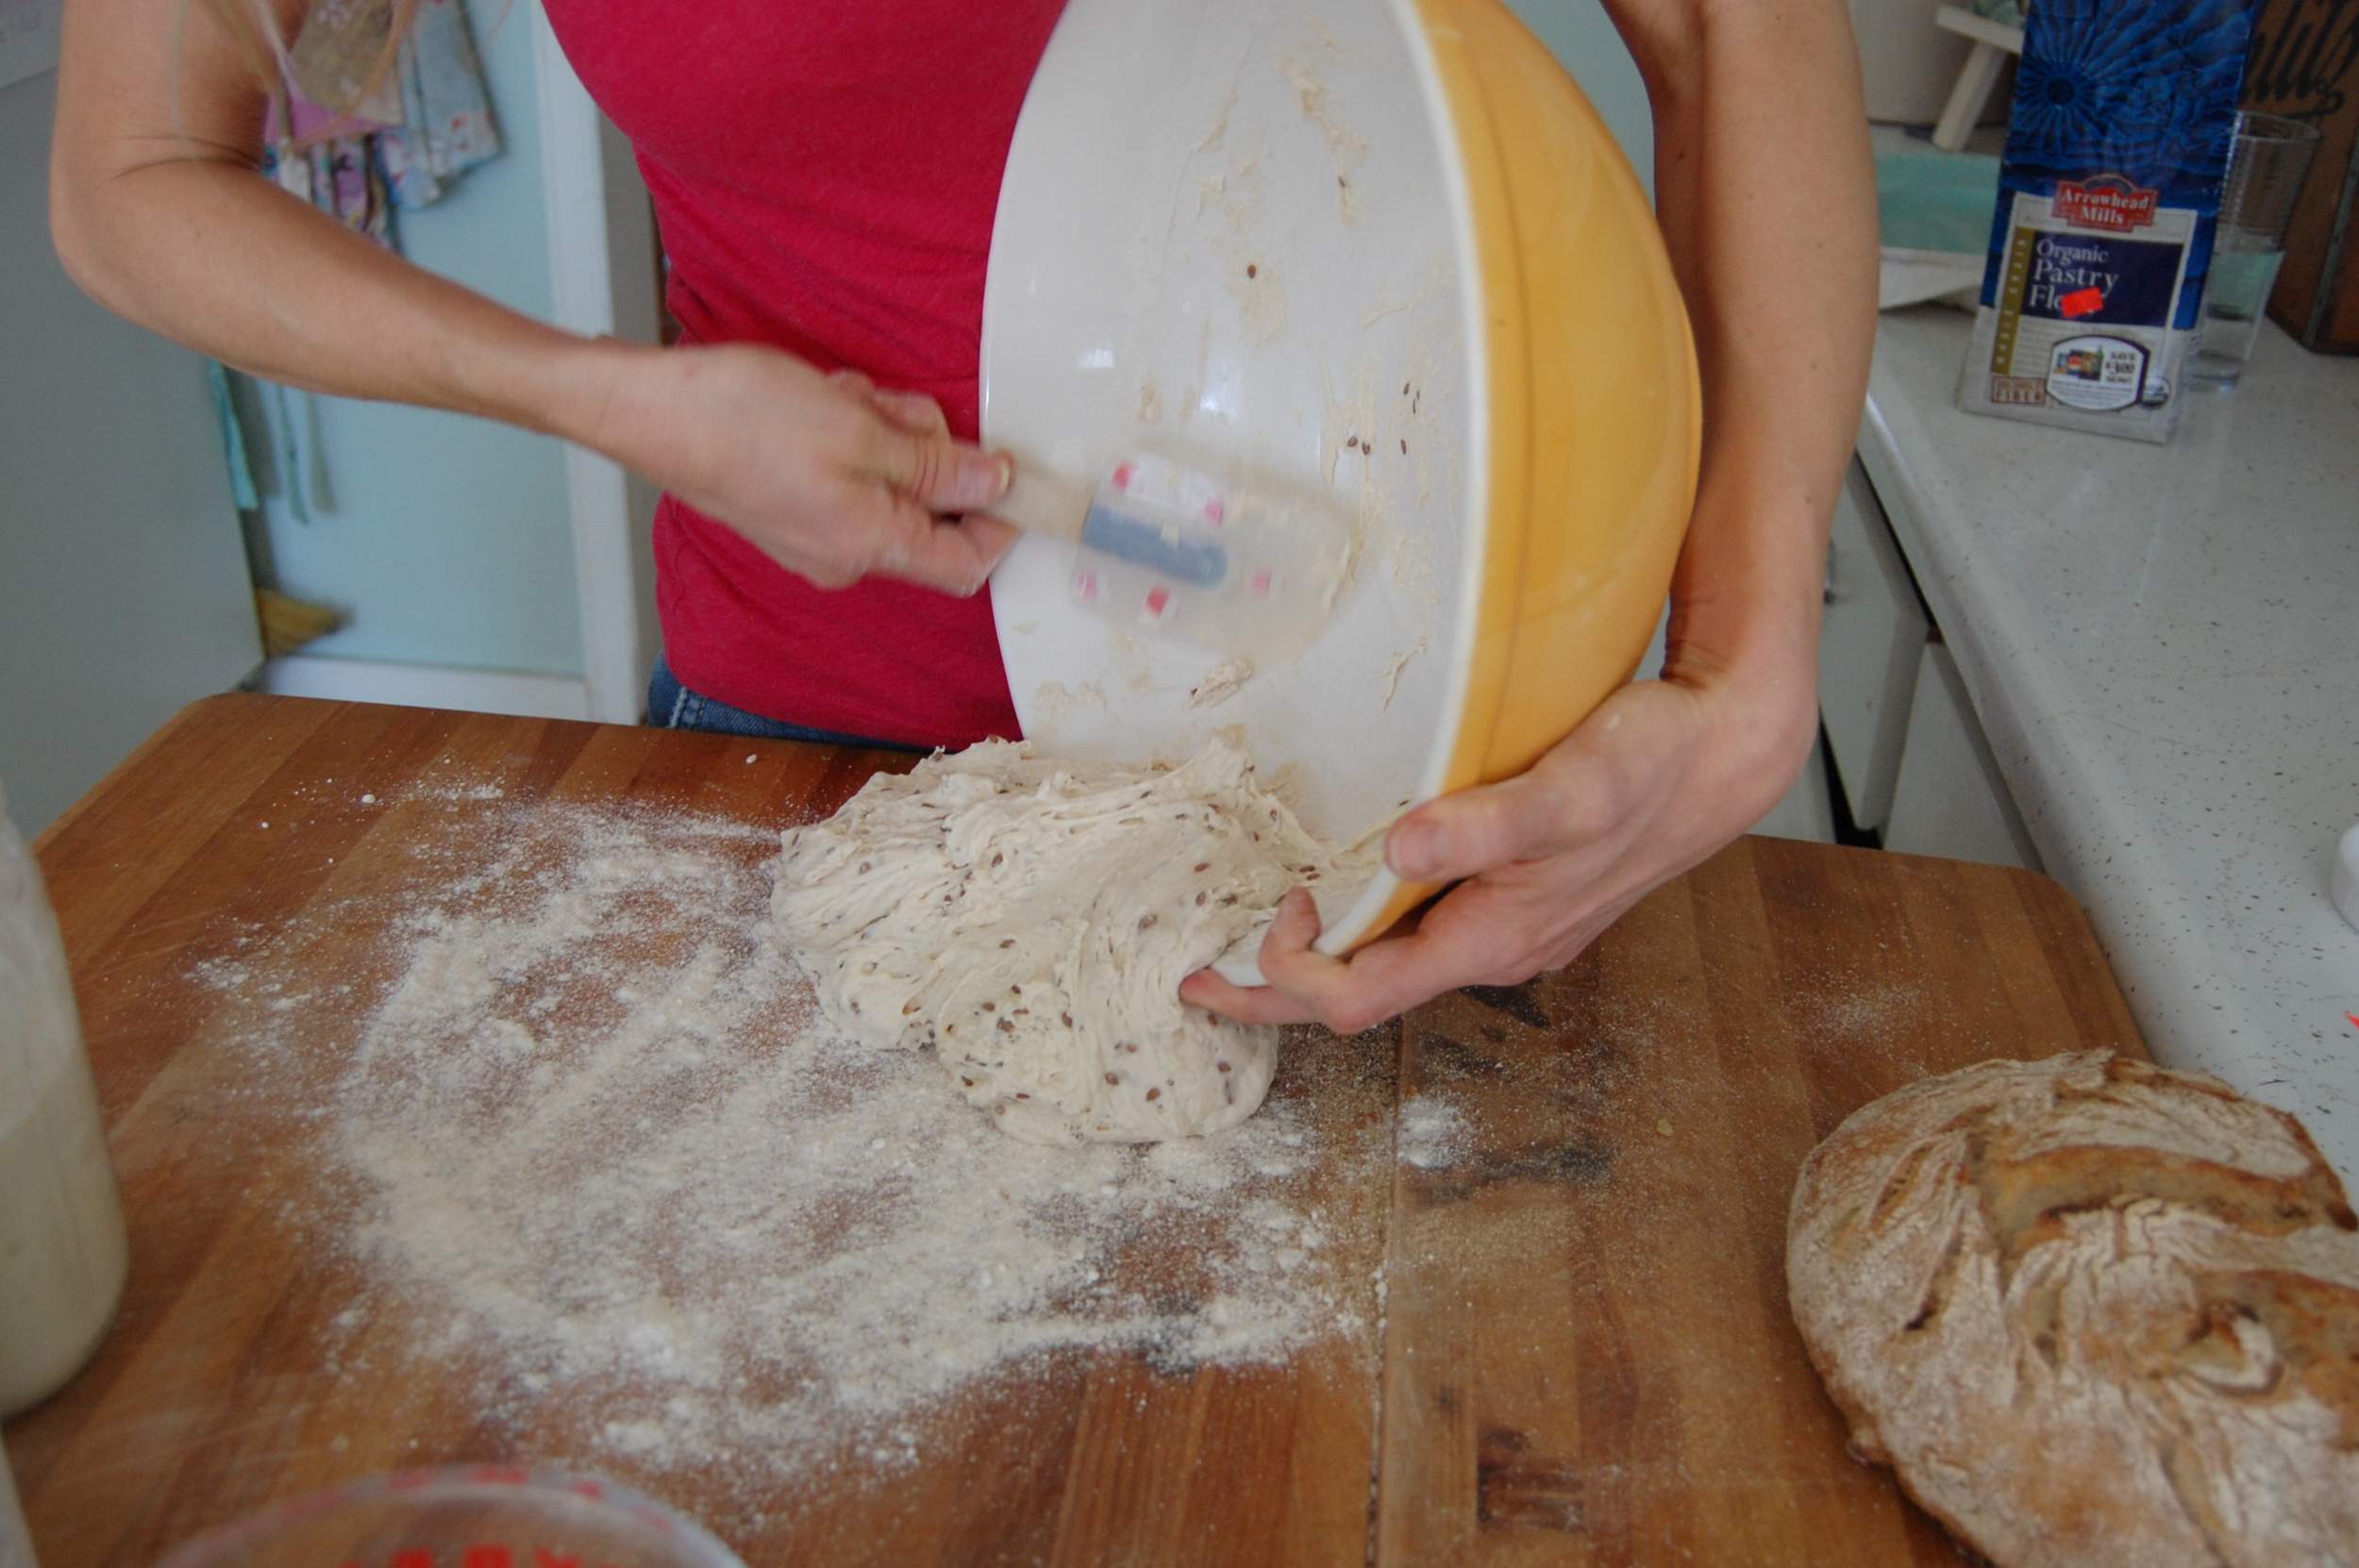
Next, pull the dough and fold it halfway over on one side, then the other (think, east then west). Then, pull and fold north, then south.
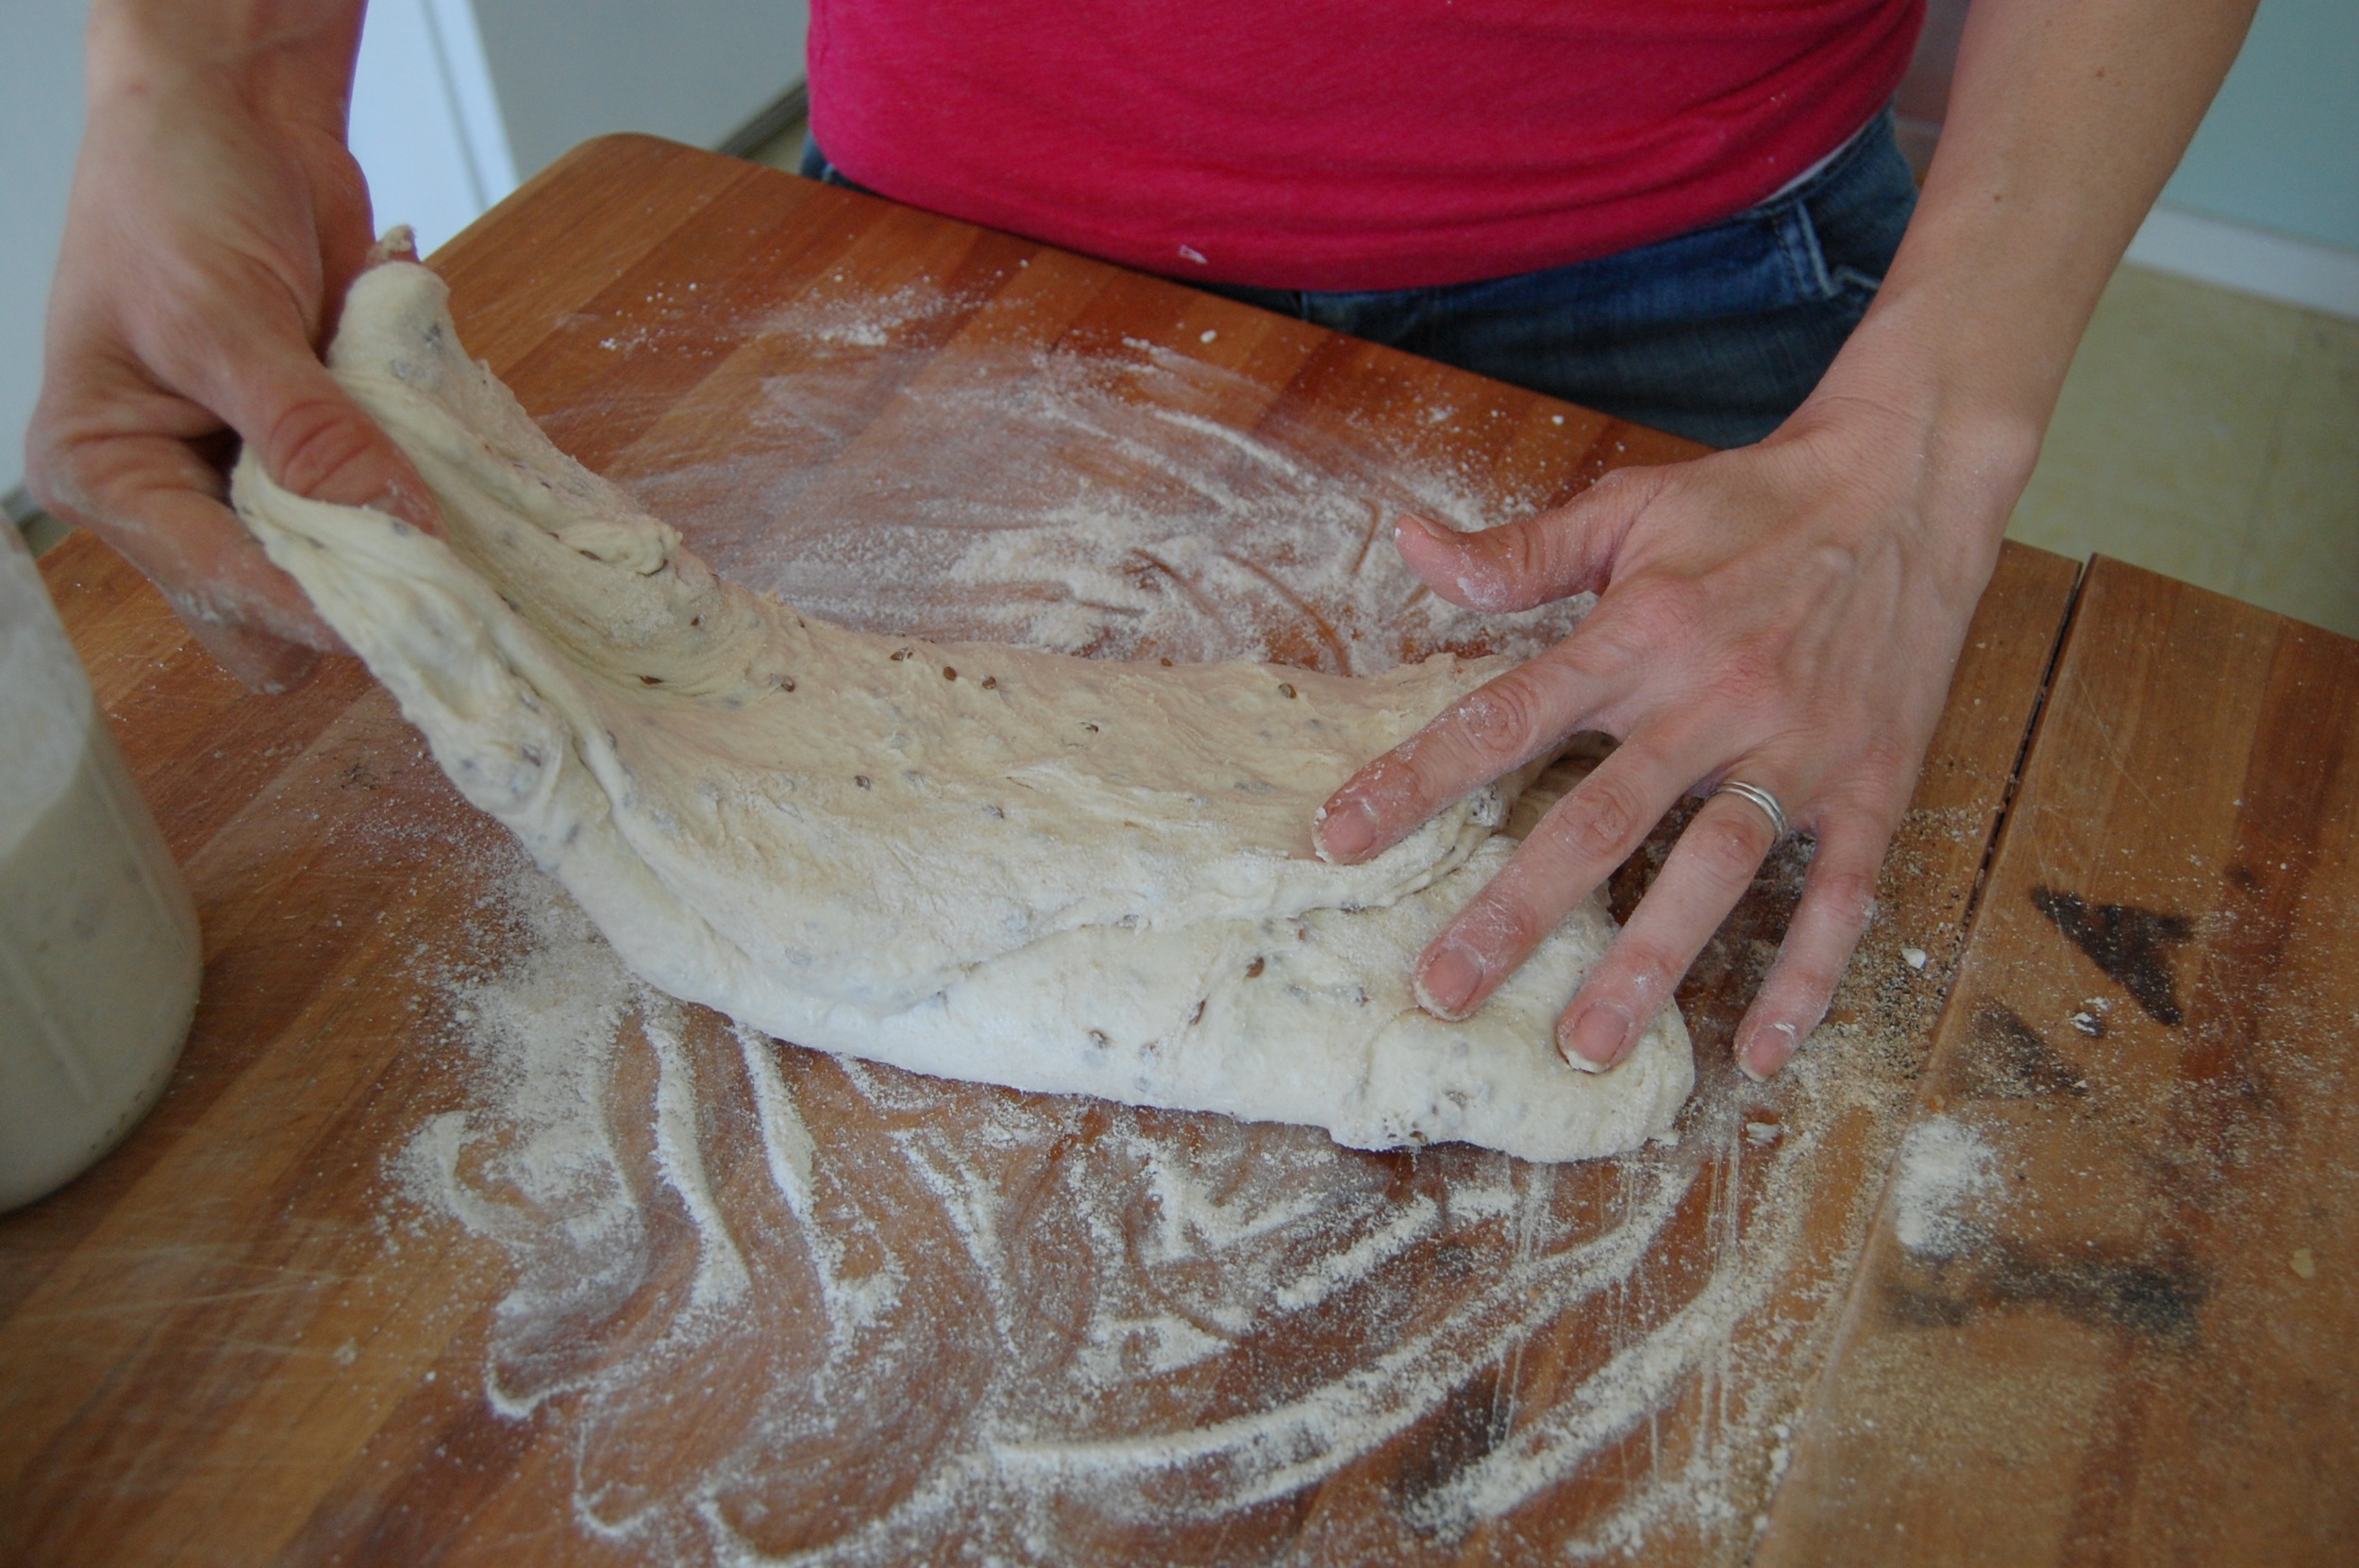
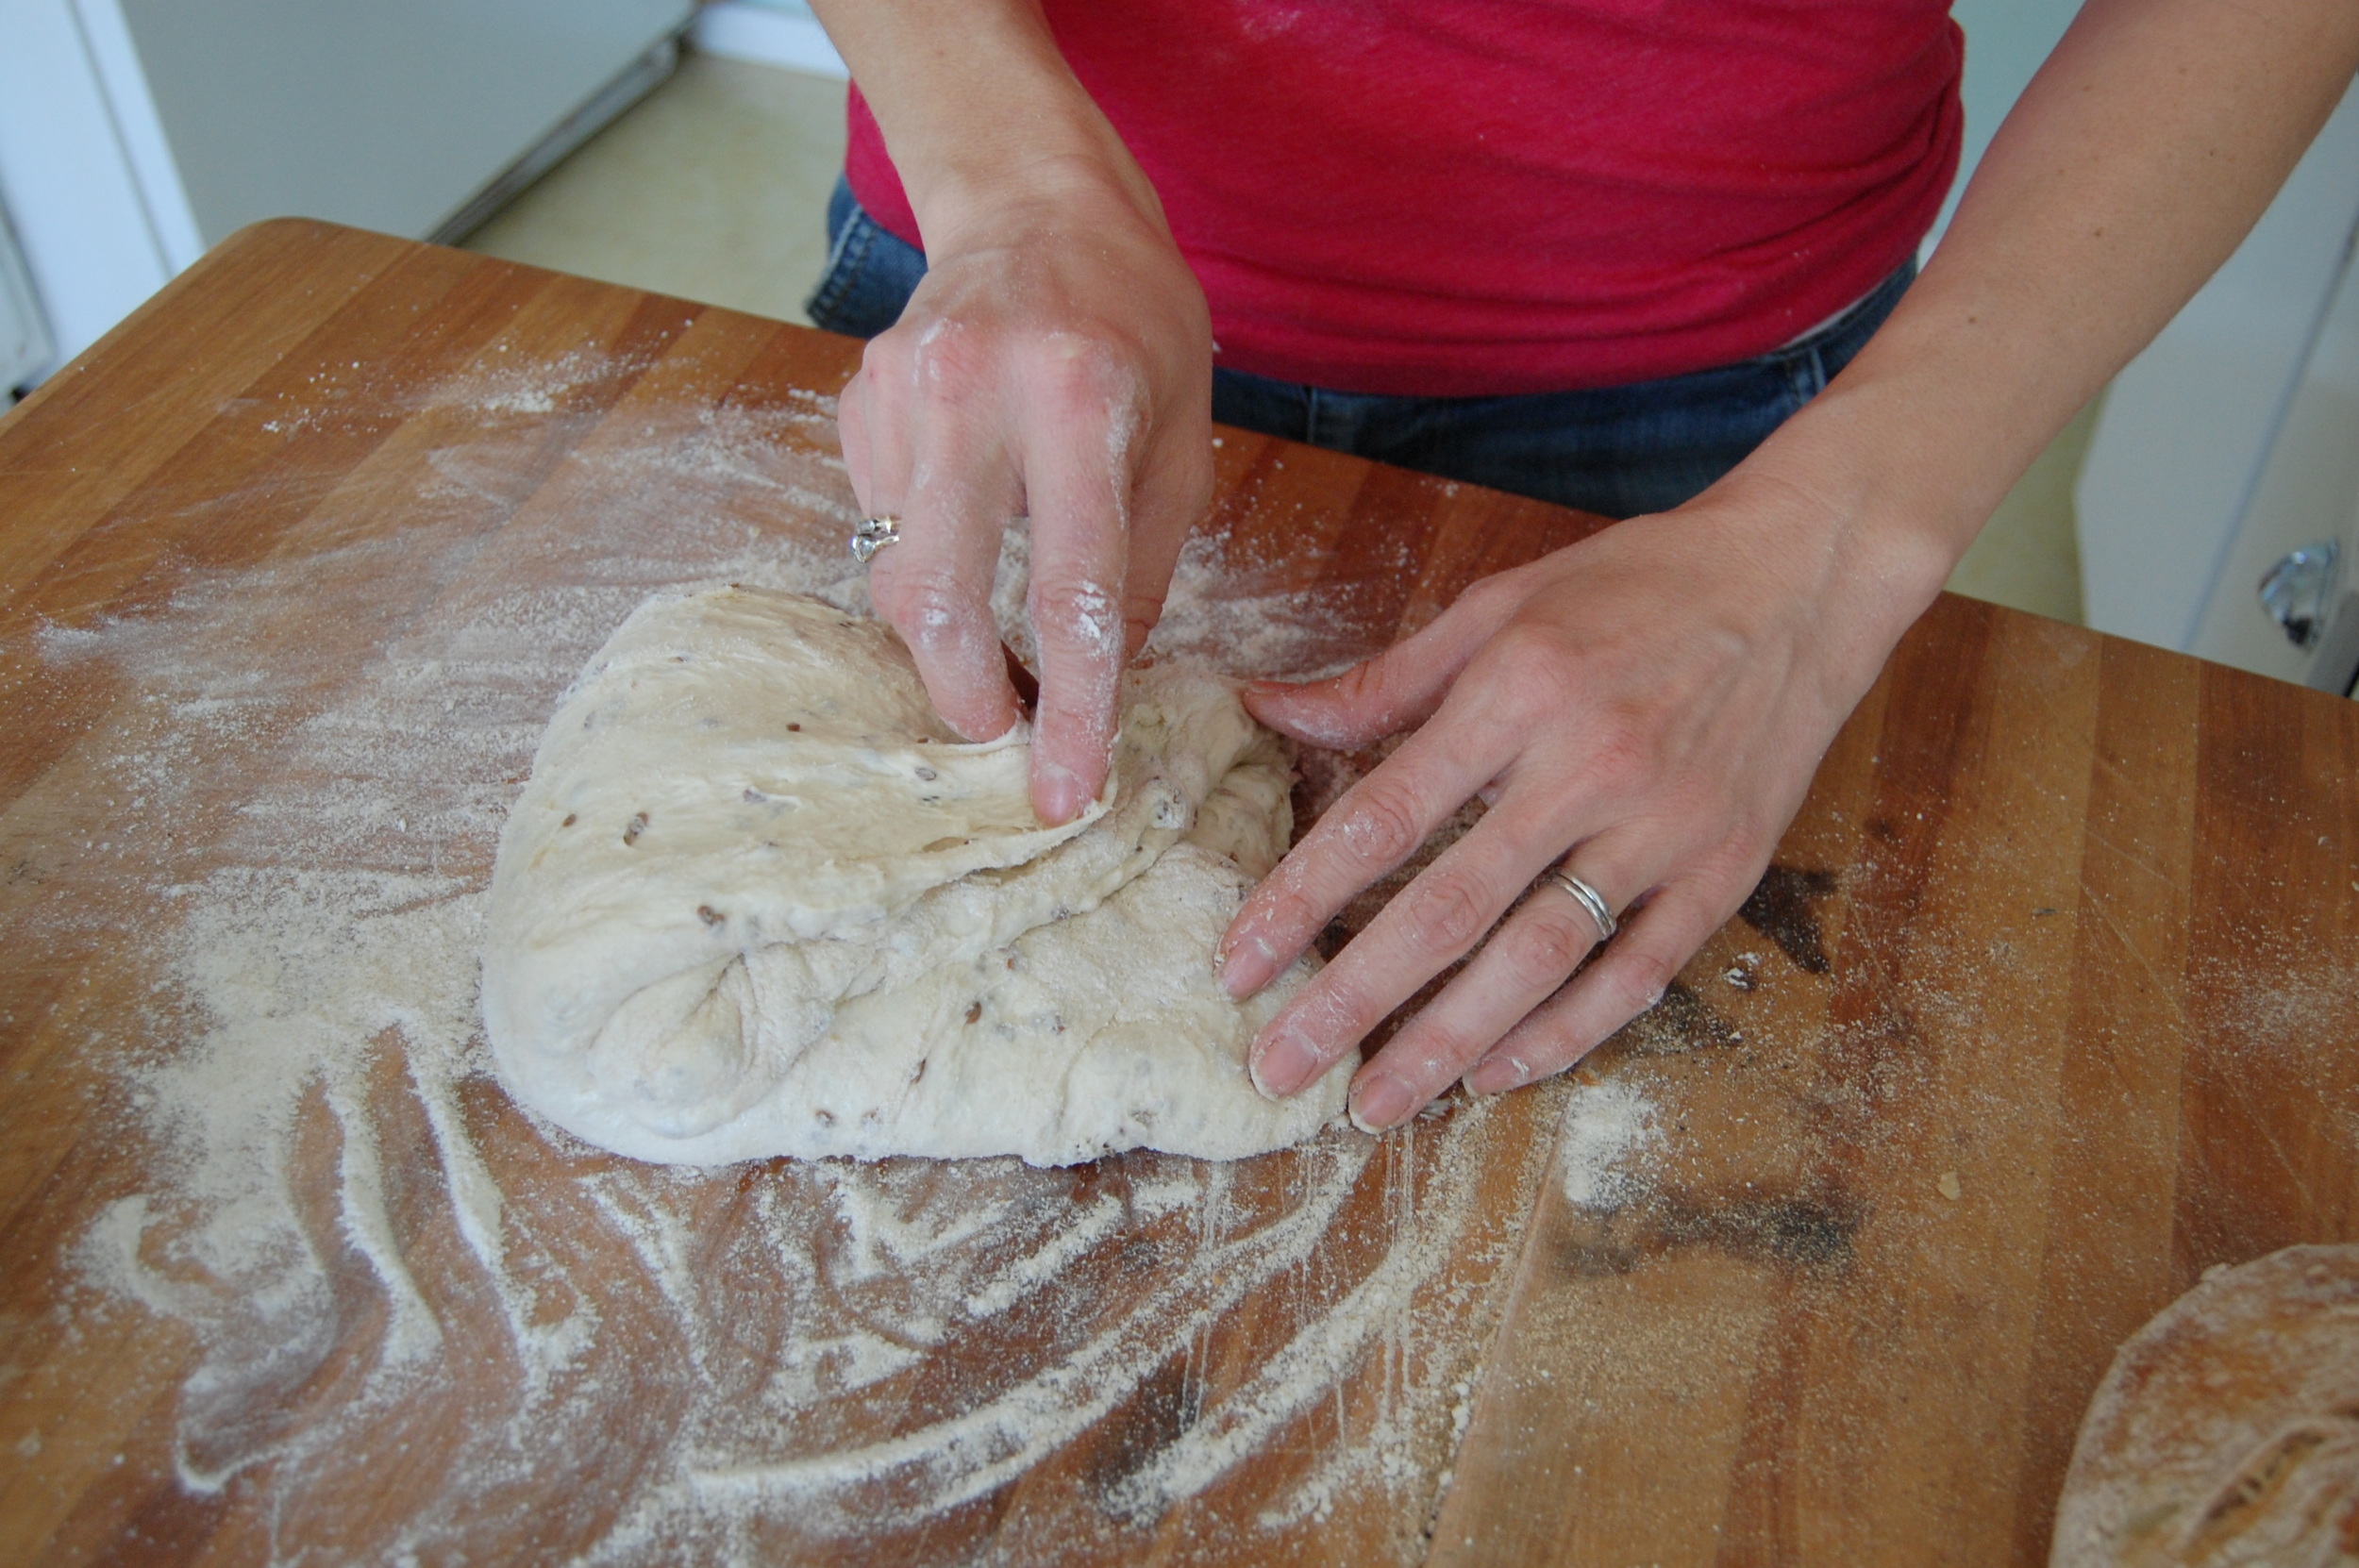
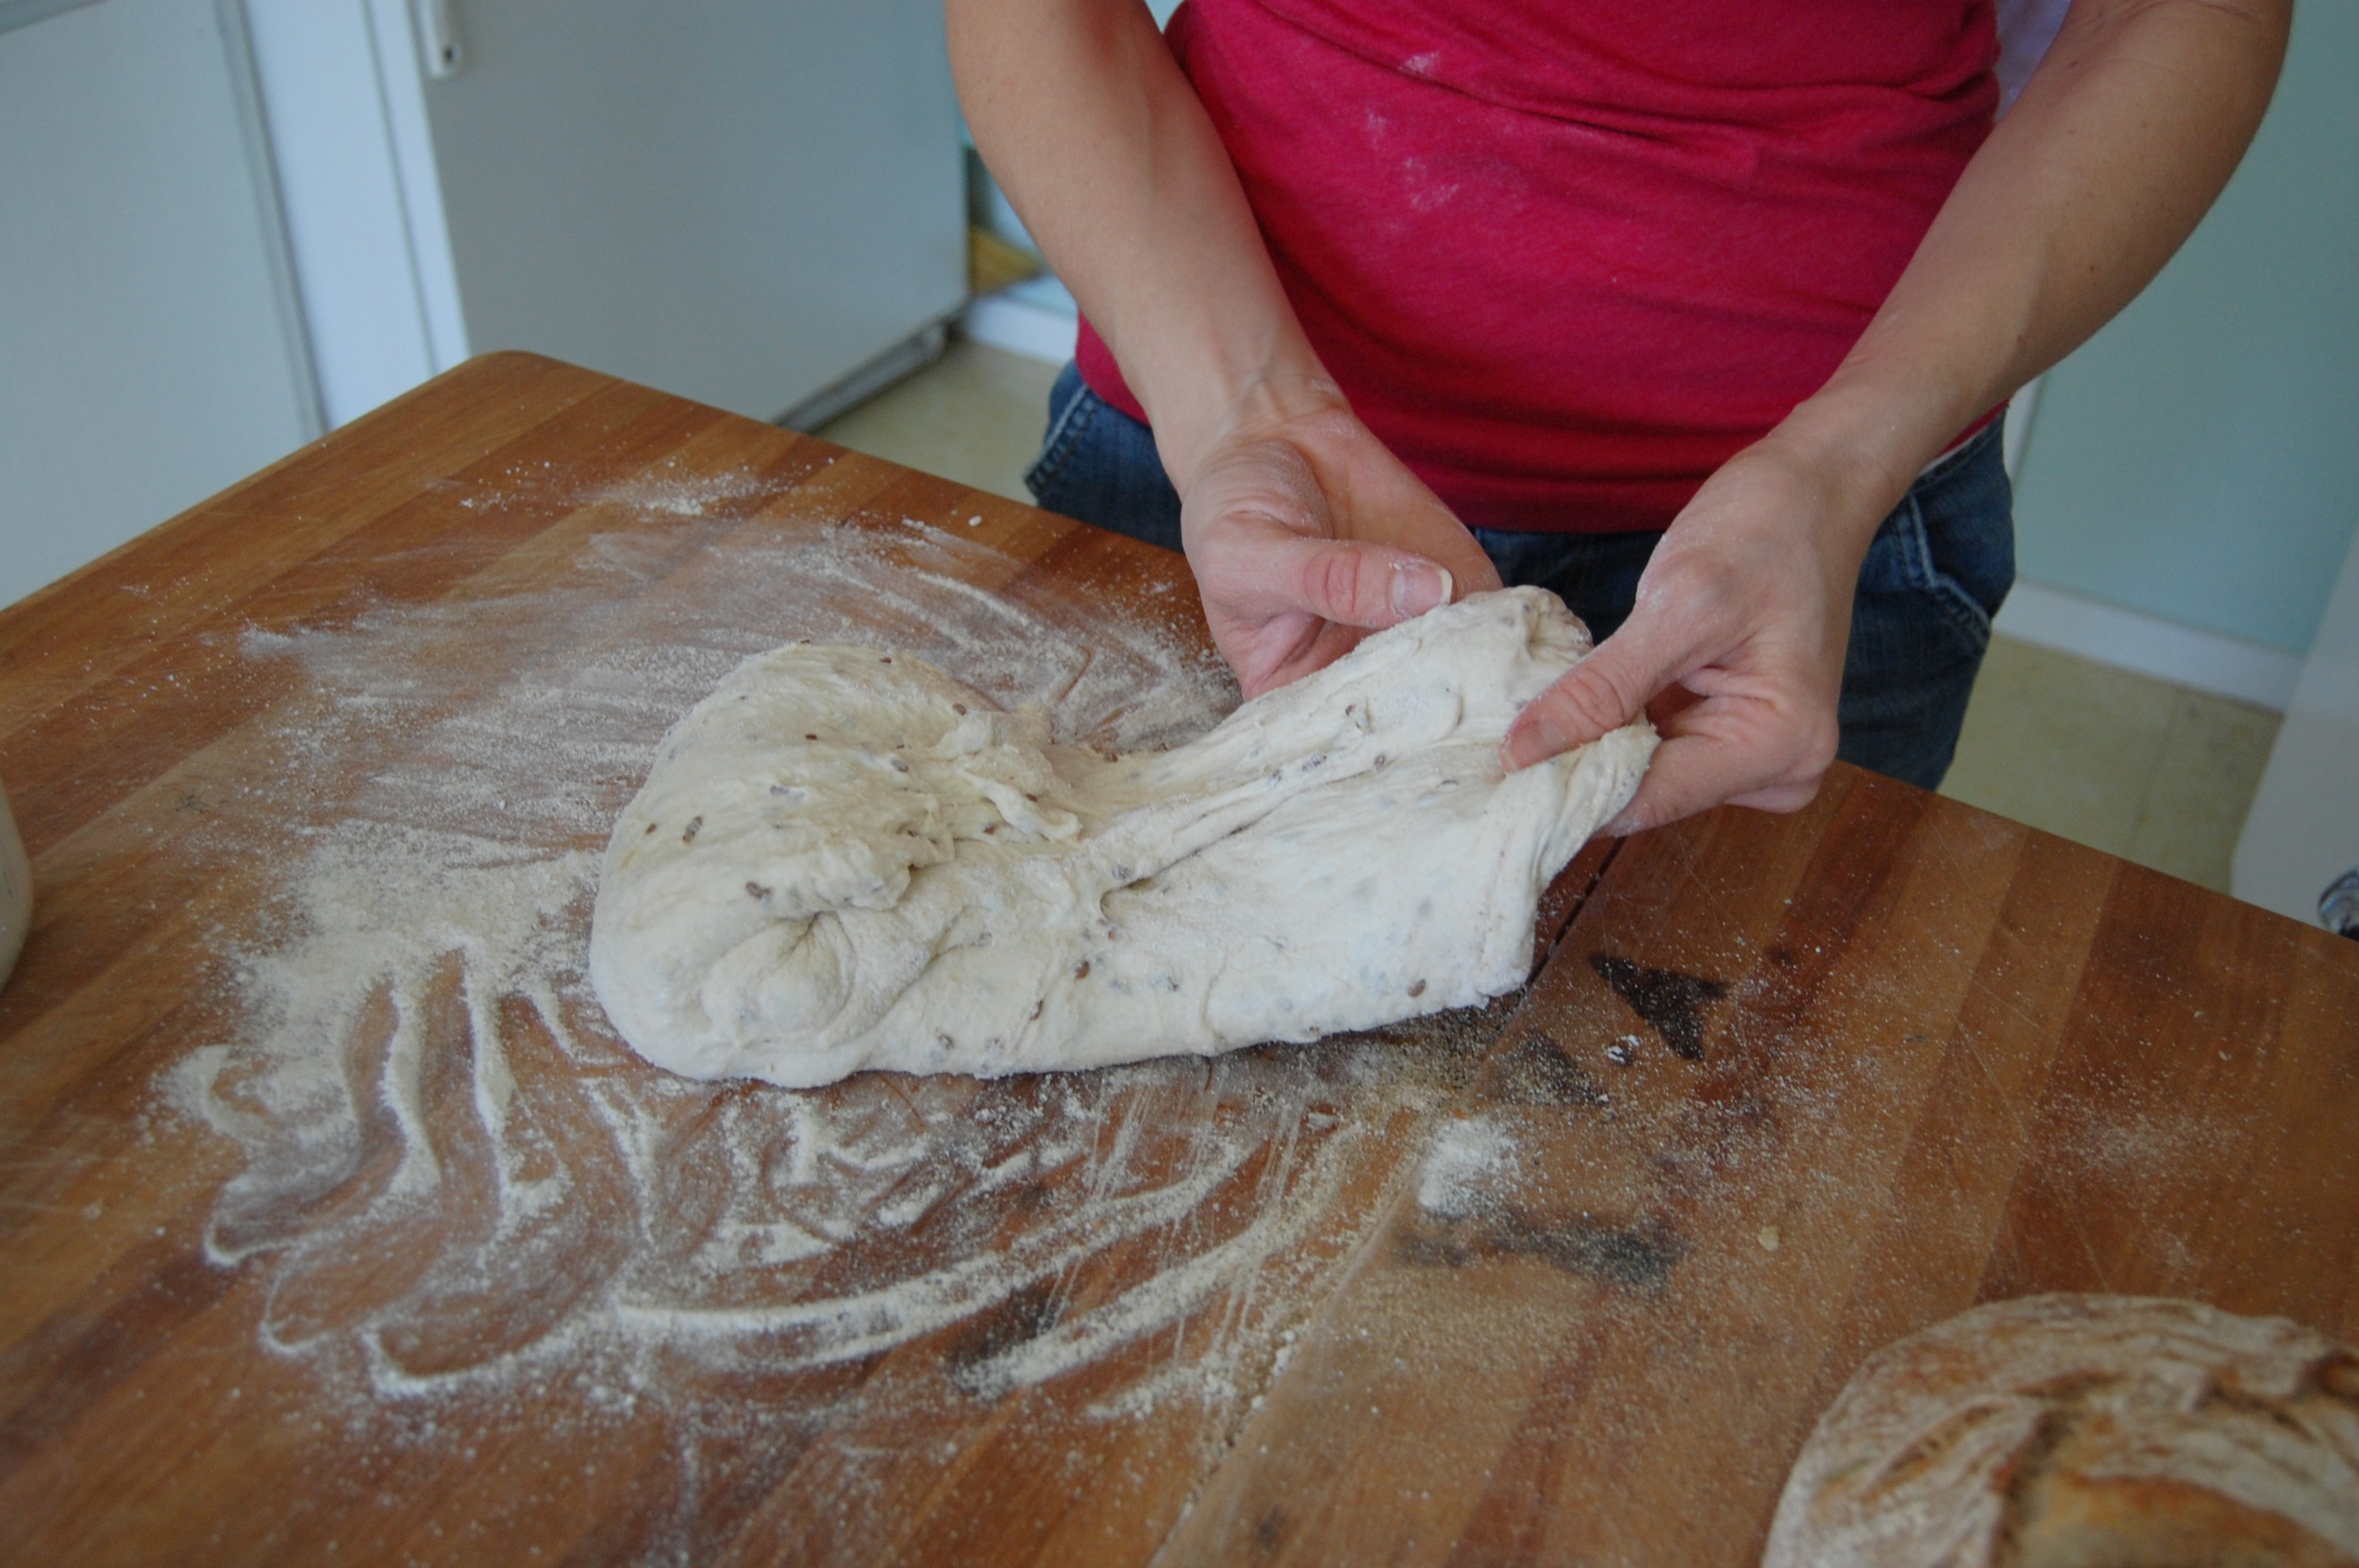
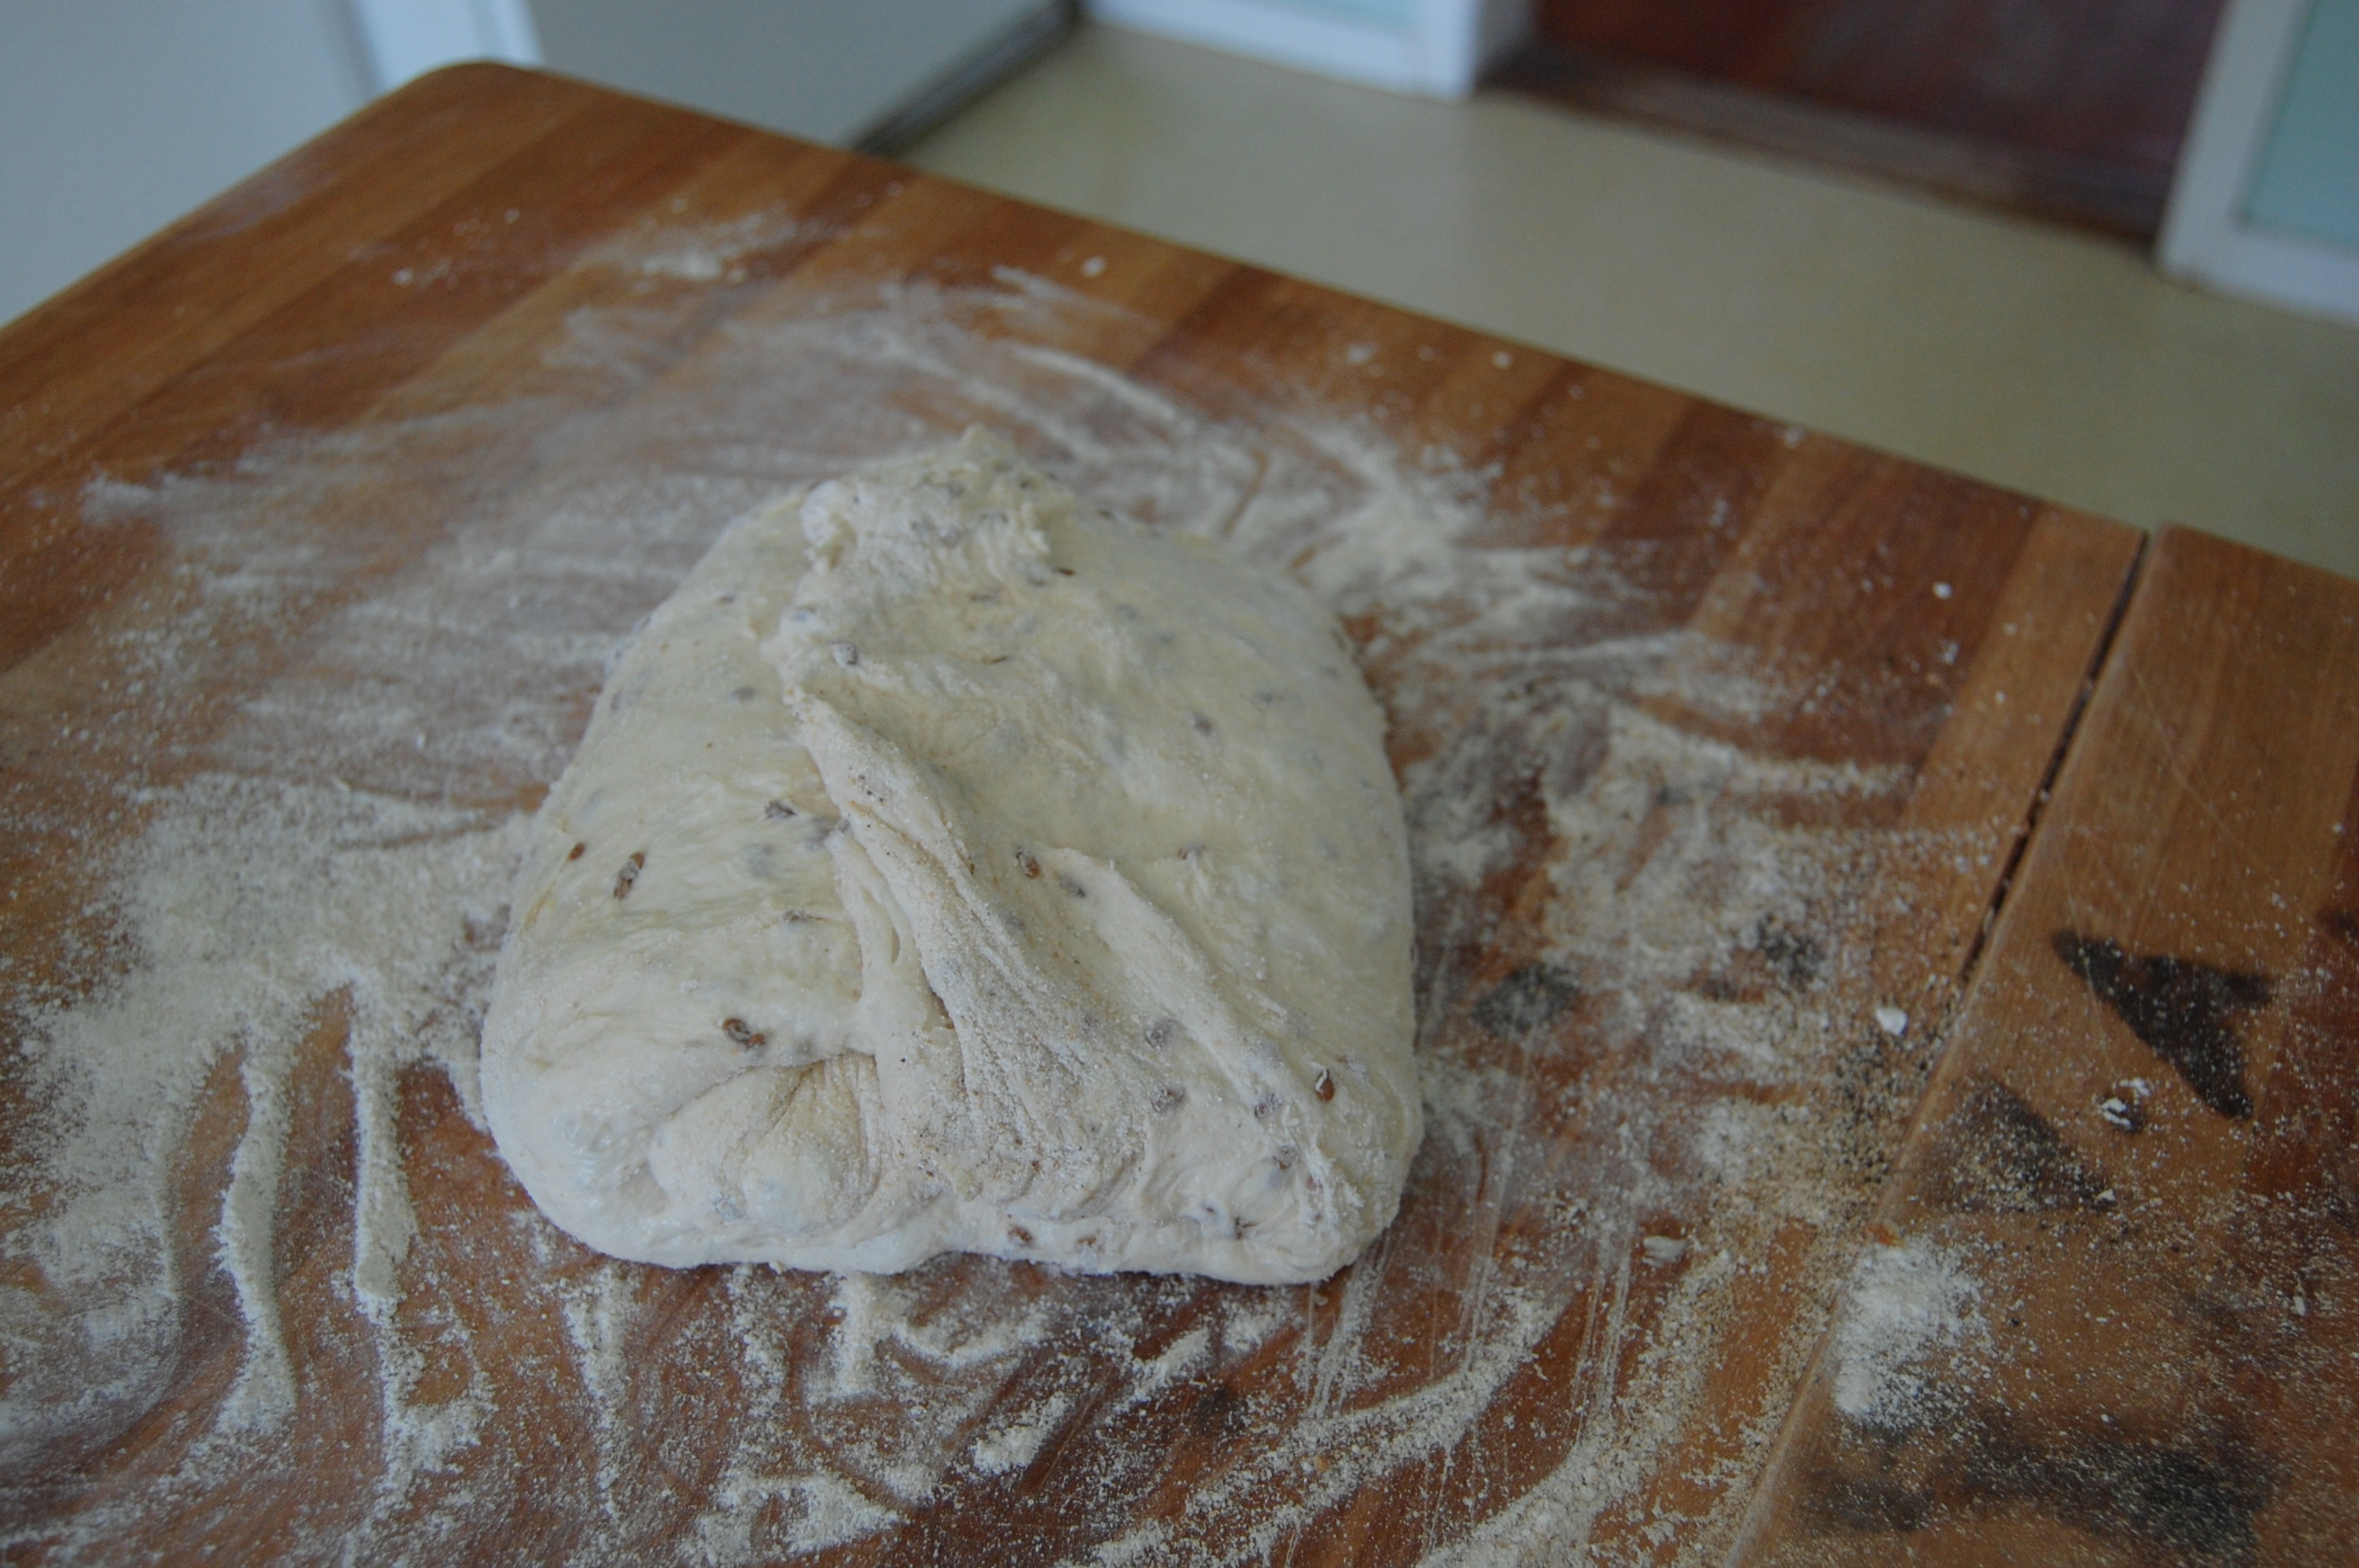
This loaf wasn't too sticky, so I just used my hands. Sometimes you'll have better luck with the dough scraper.
Next, flip the loaf over so that the seams are on the bottom. Then tuck and turn as you gently shape it into a loaf.

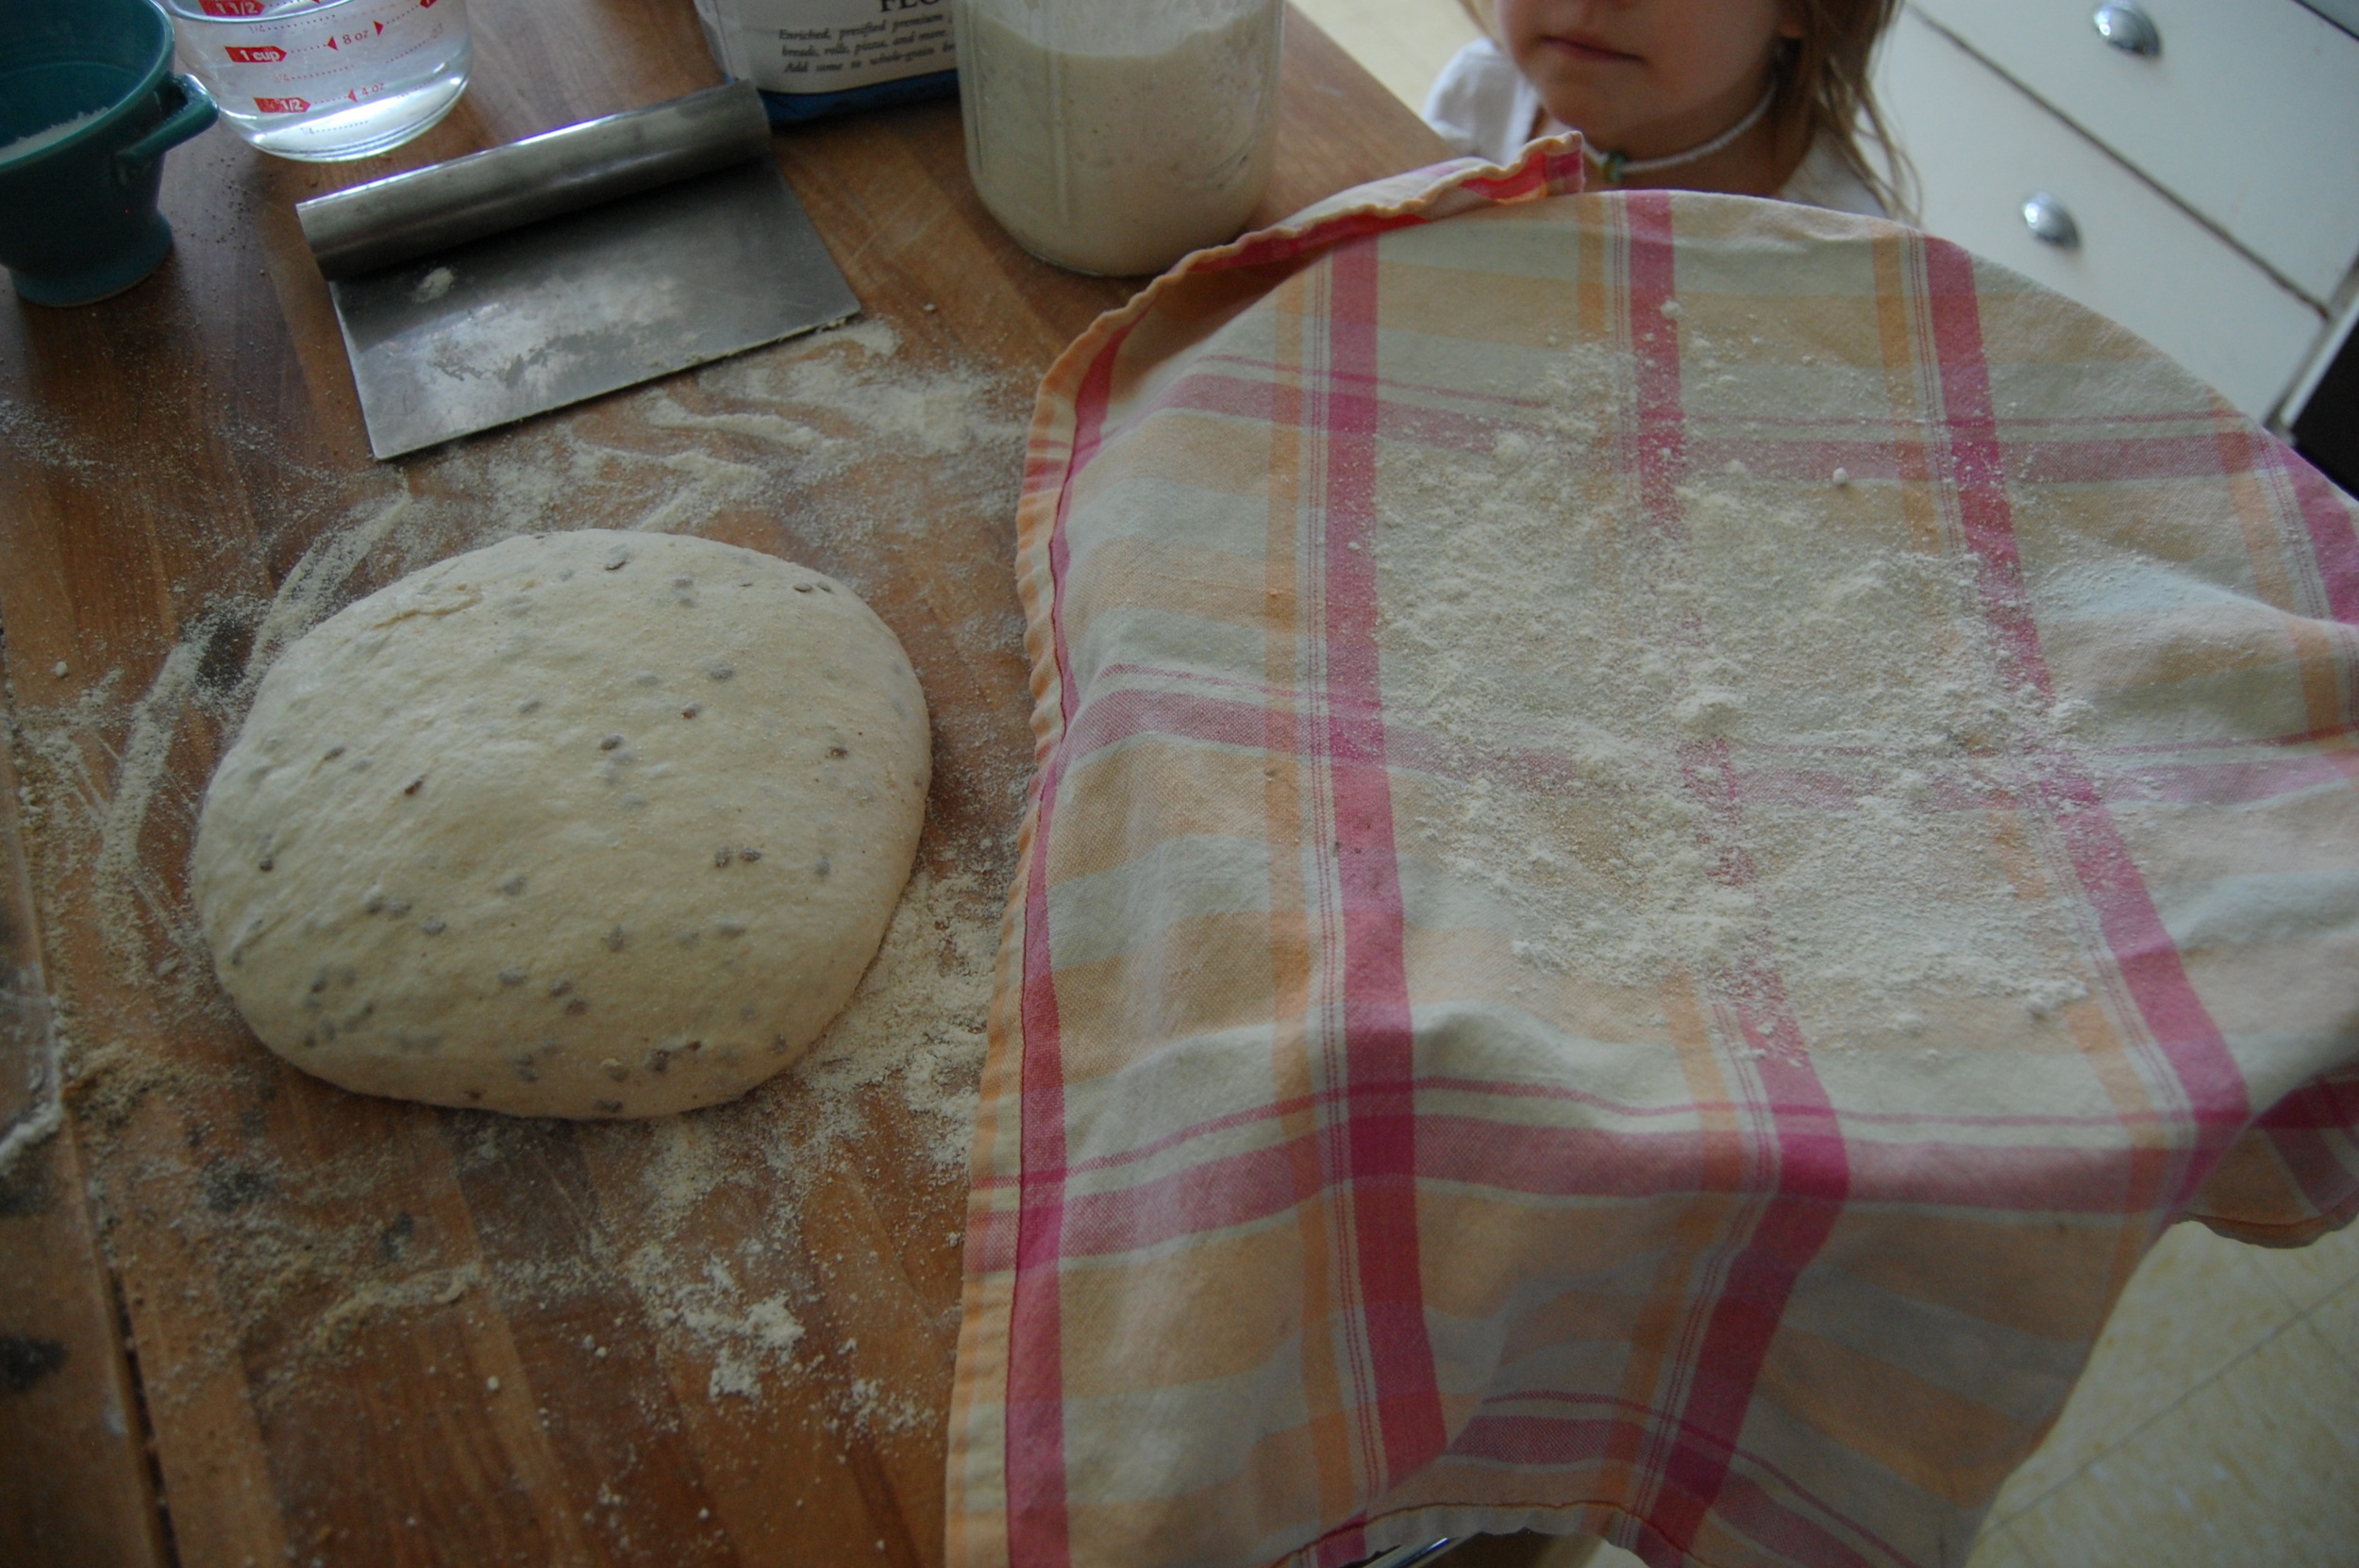
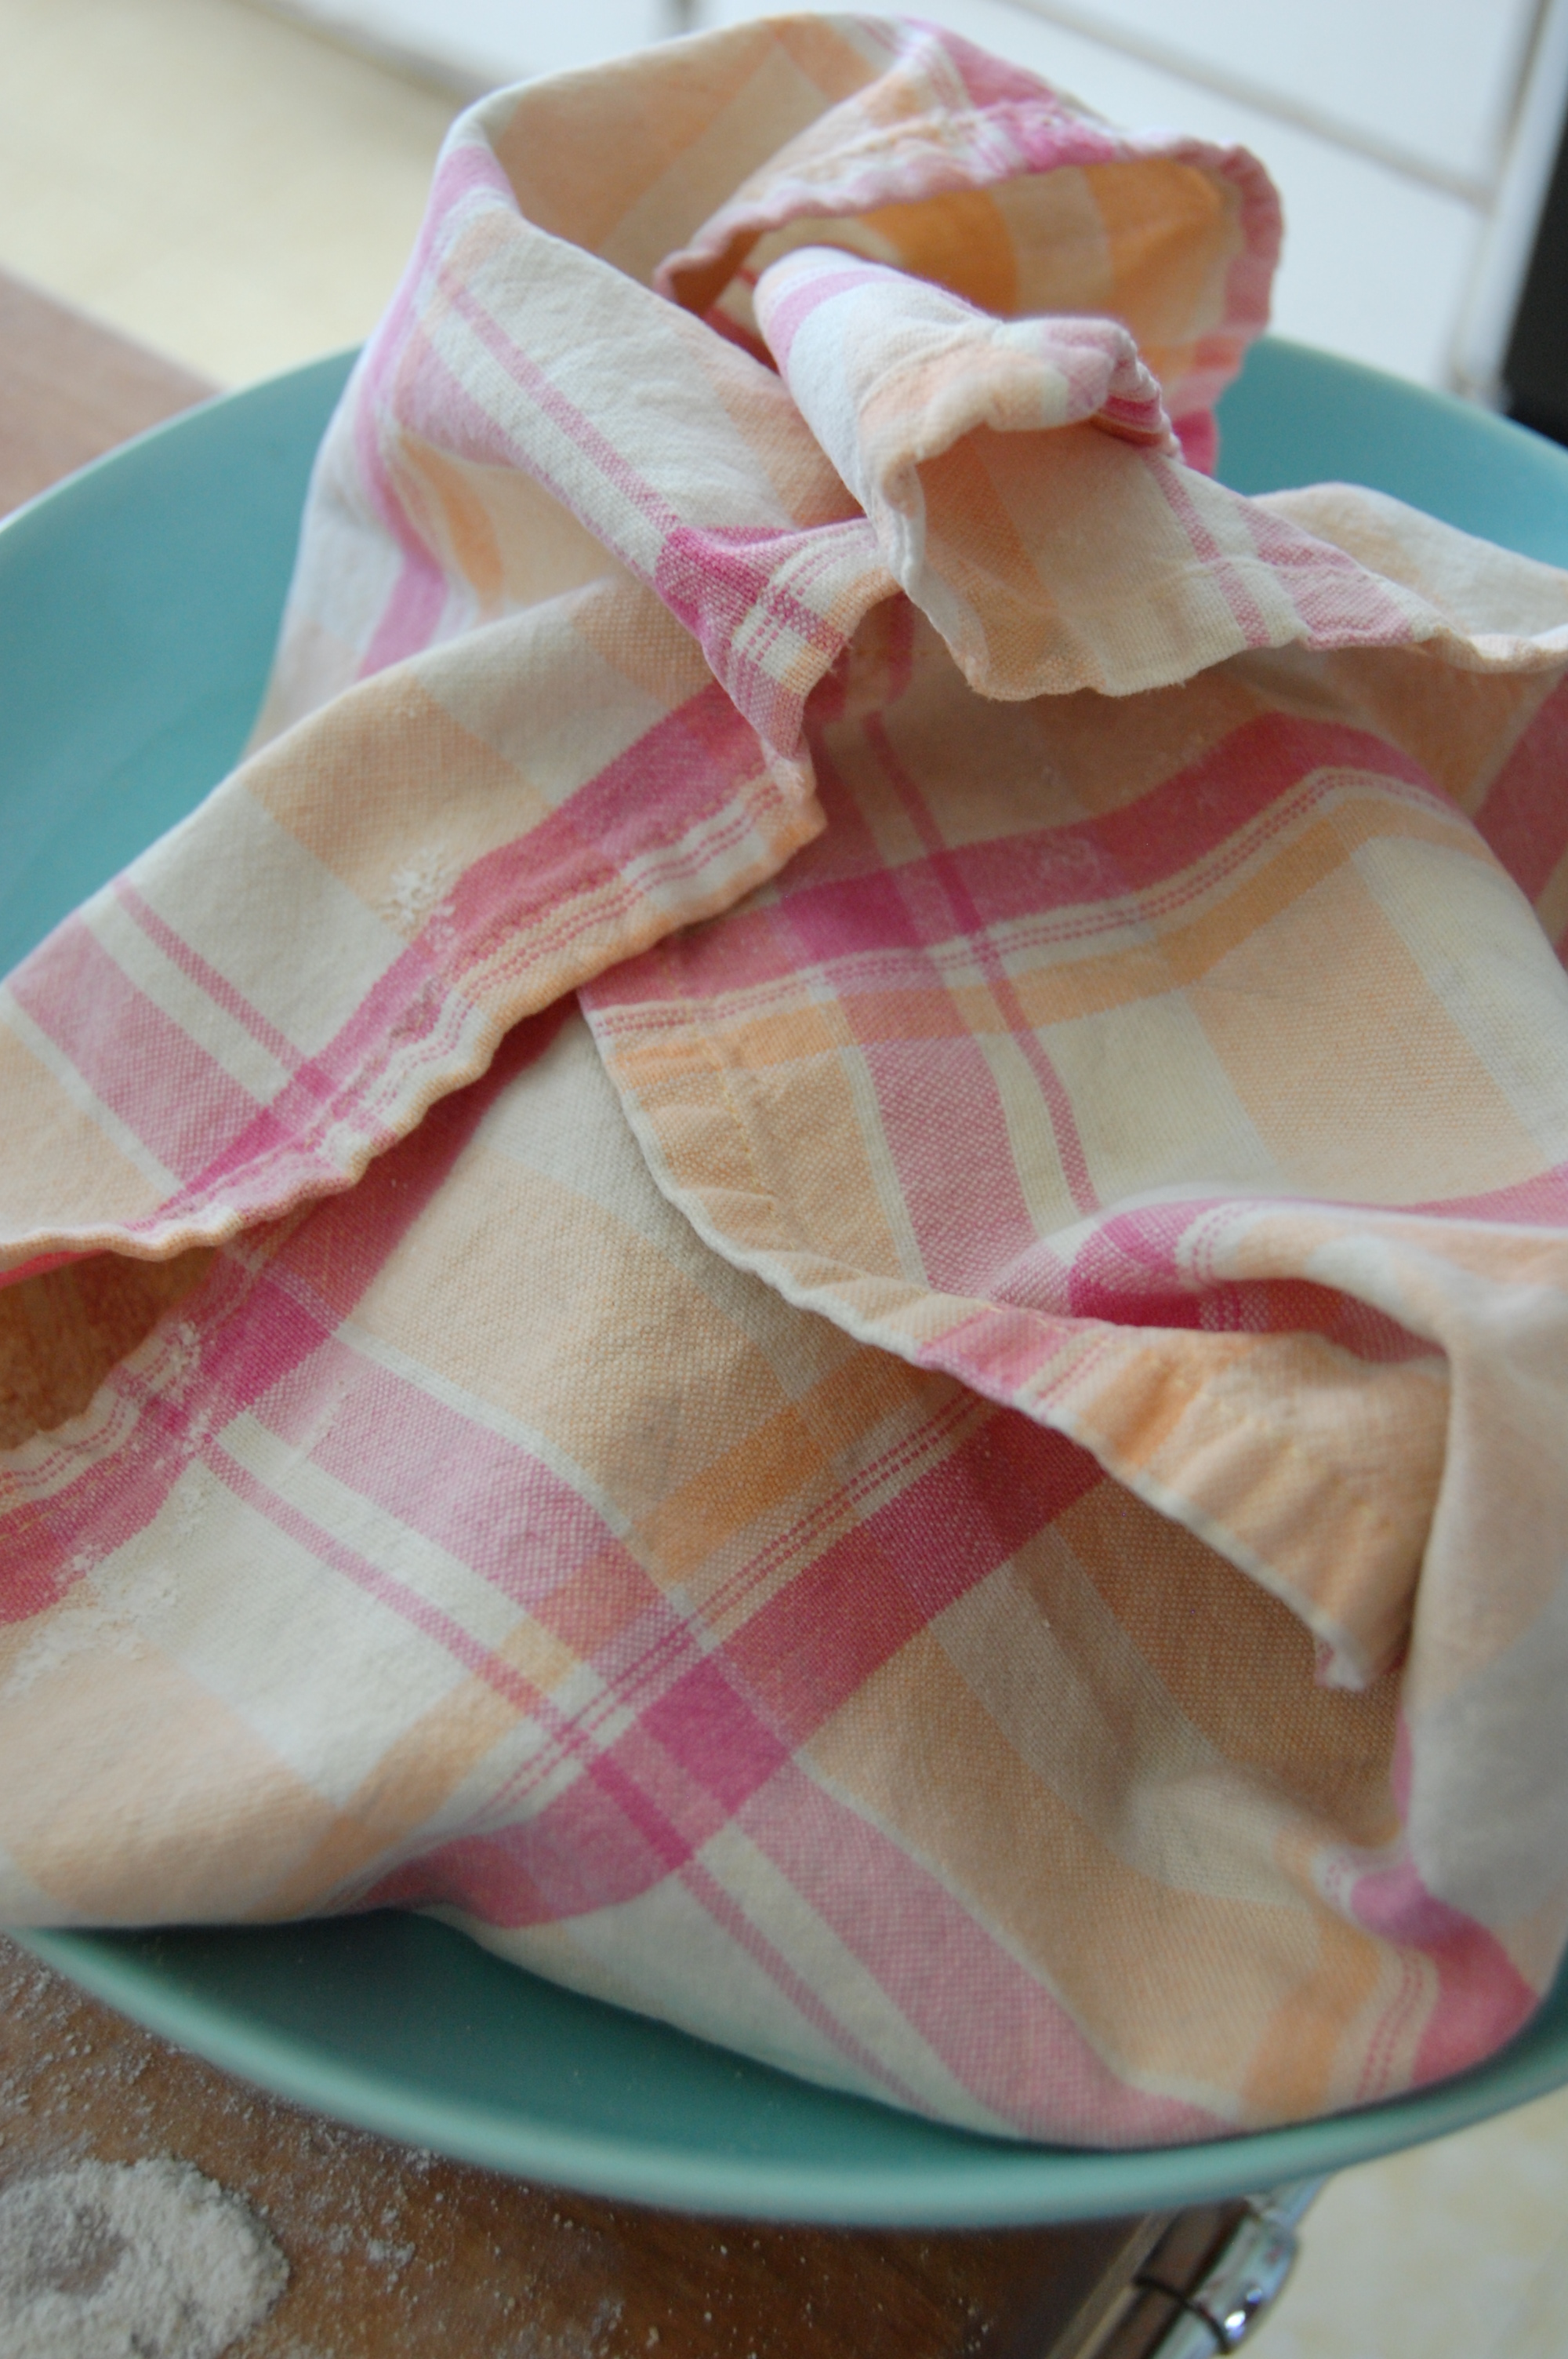
Set your tea towel onto the plate, and dust it generously with flour. Lift your loaf onto the tea towel and sprinkle the loaf on top with more flour. Gently fold the towel over the loaf (not tight - it will expand a bit and you don't want it to stick).
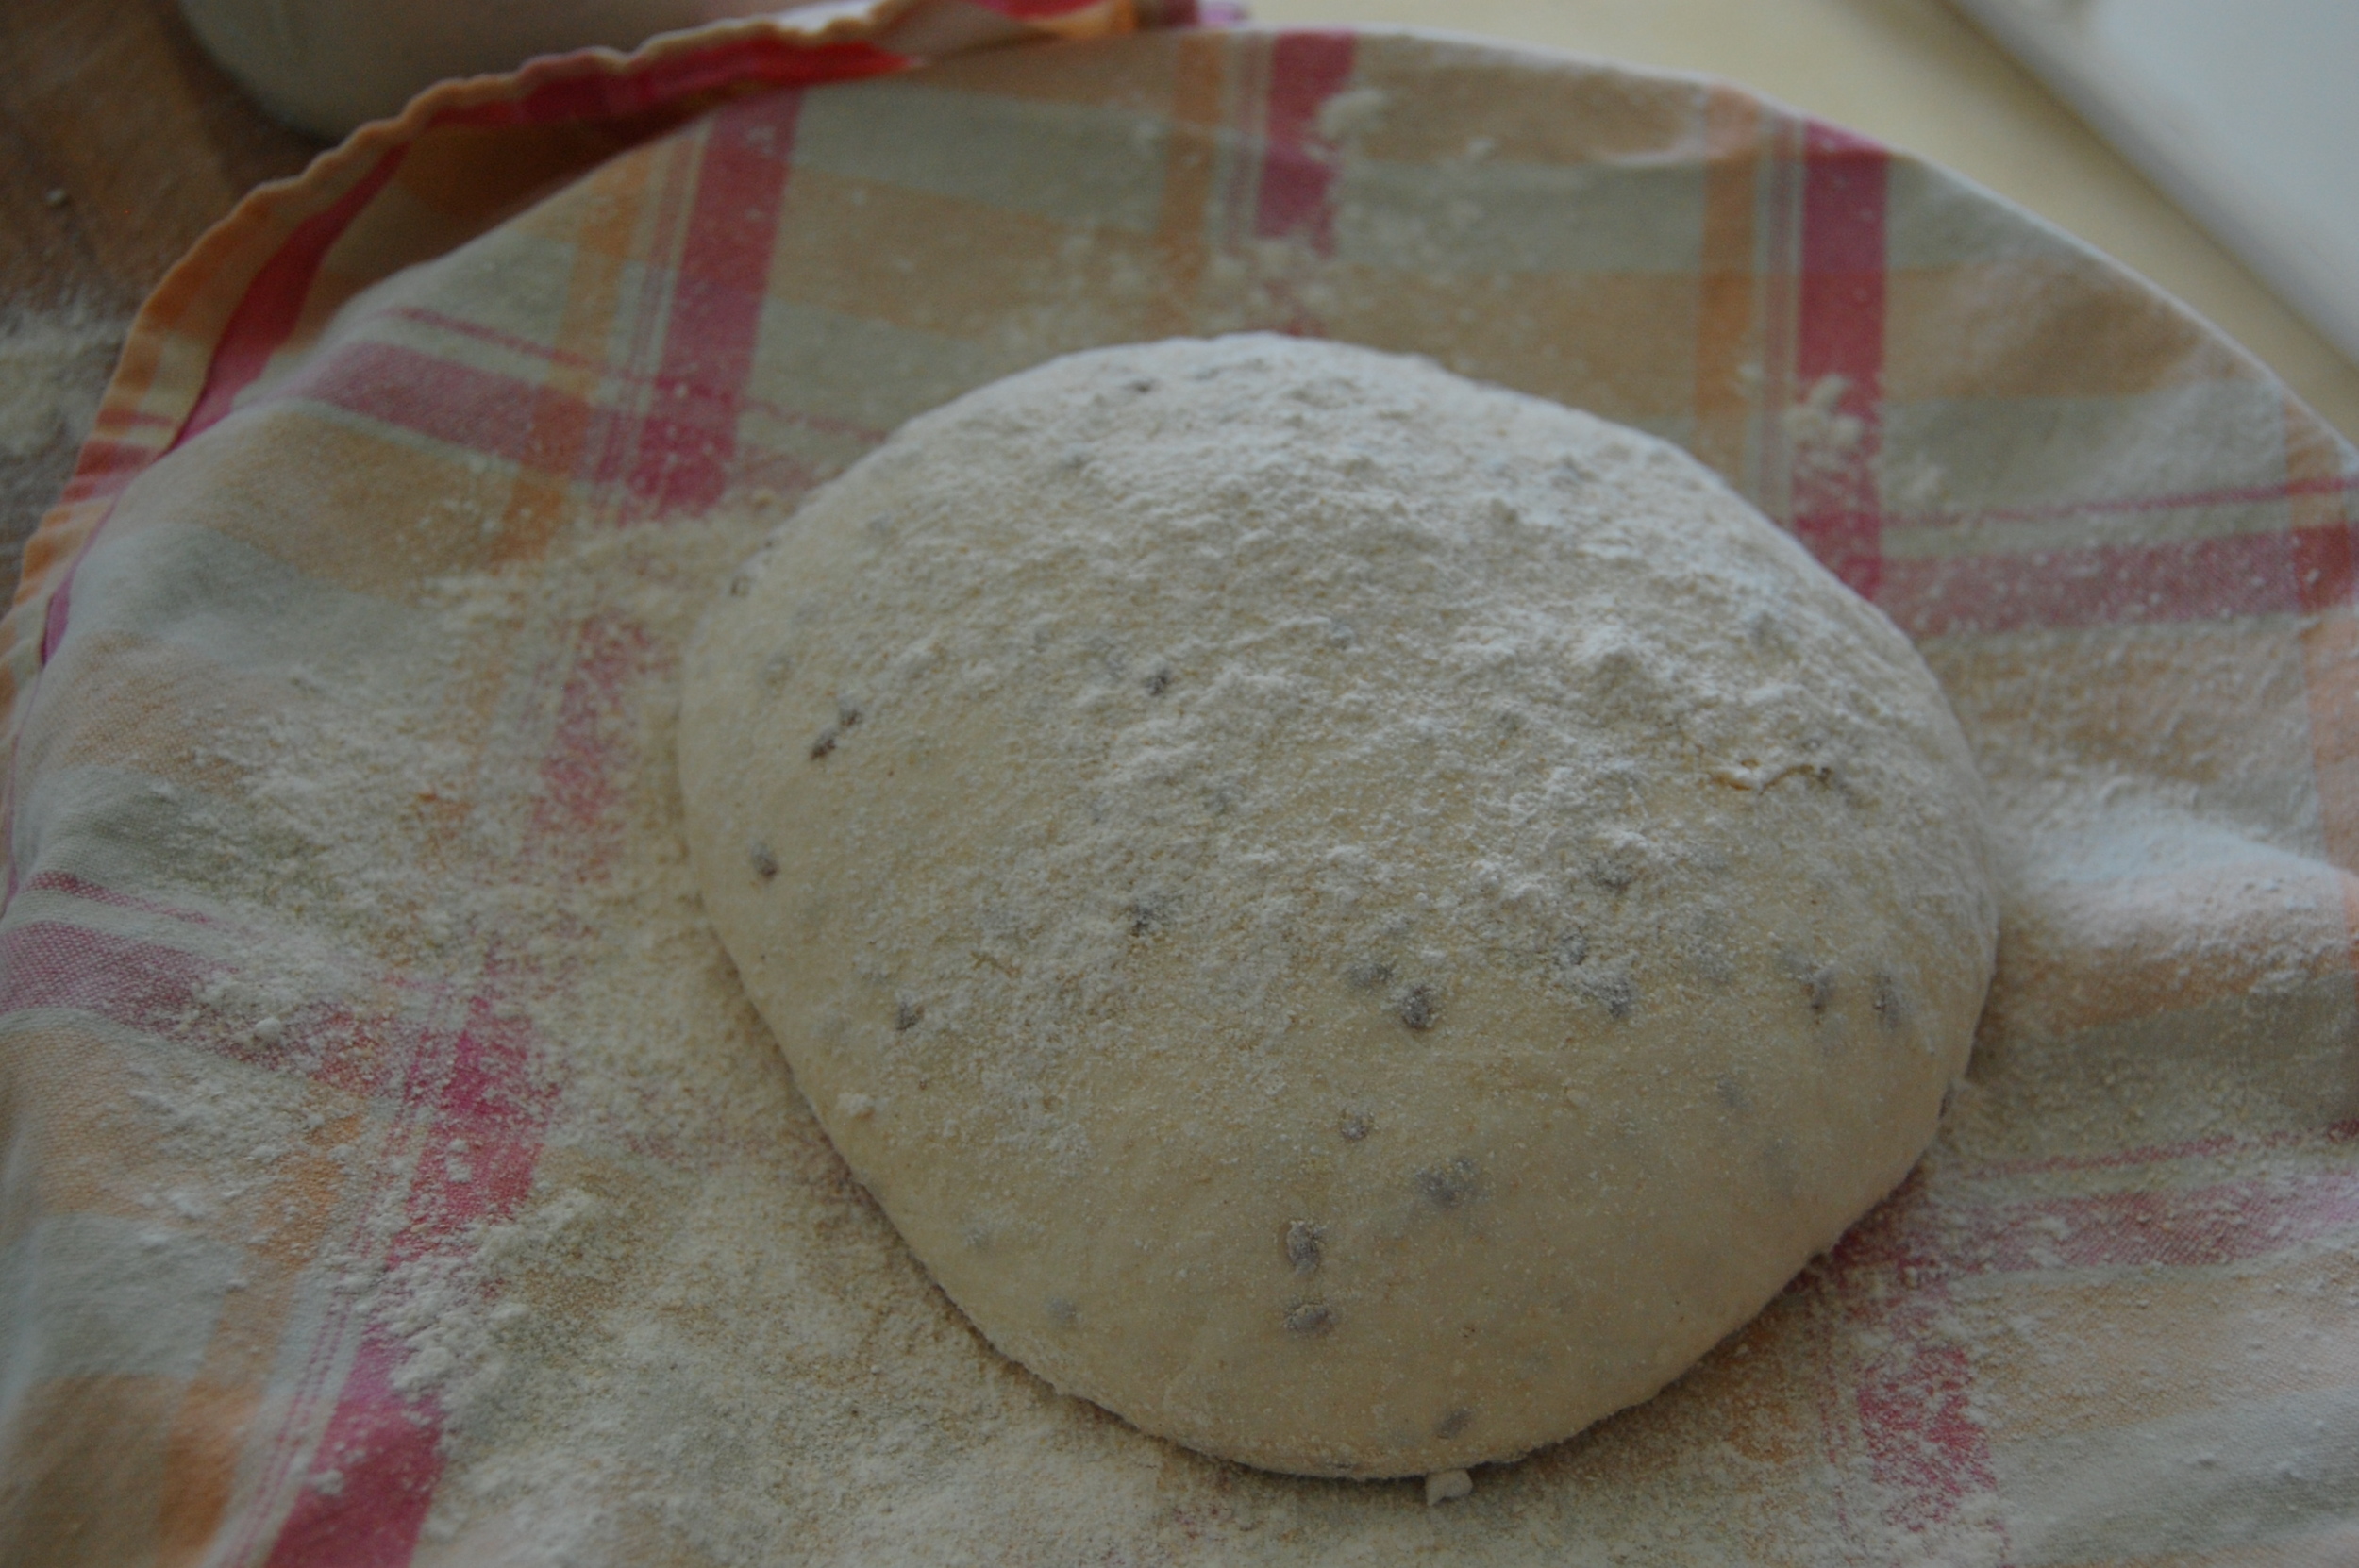
Let your loaf proof for another 45 minutes. Preheat your oven to 500 degrees - about halfway through this rest period. Make sure your dutch oven (with the lid) is preheating inside the oven.
BAKE LOAF

Now that the oven and pot are preheated to 500 degrees, your loaf has been resting for 45 minutes, you are ready to bake! Gently fold back the tea towel and slide your hand in between the plate and the towel, to remove the loaf. I do this over the sink so that some of the dusting flour doesn't go all over the floor - but it still usually makes a bit of a mess.
Carefully open the oven with your other hand and remove the lid to the (very hot) dutch oven. Flip the loaf upside down into the pot (the seams will now be on top) and cover it with the lid.
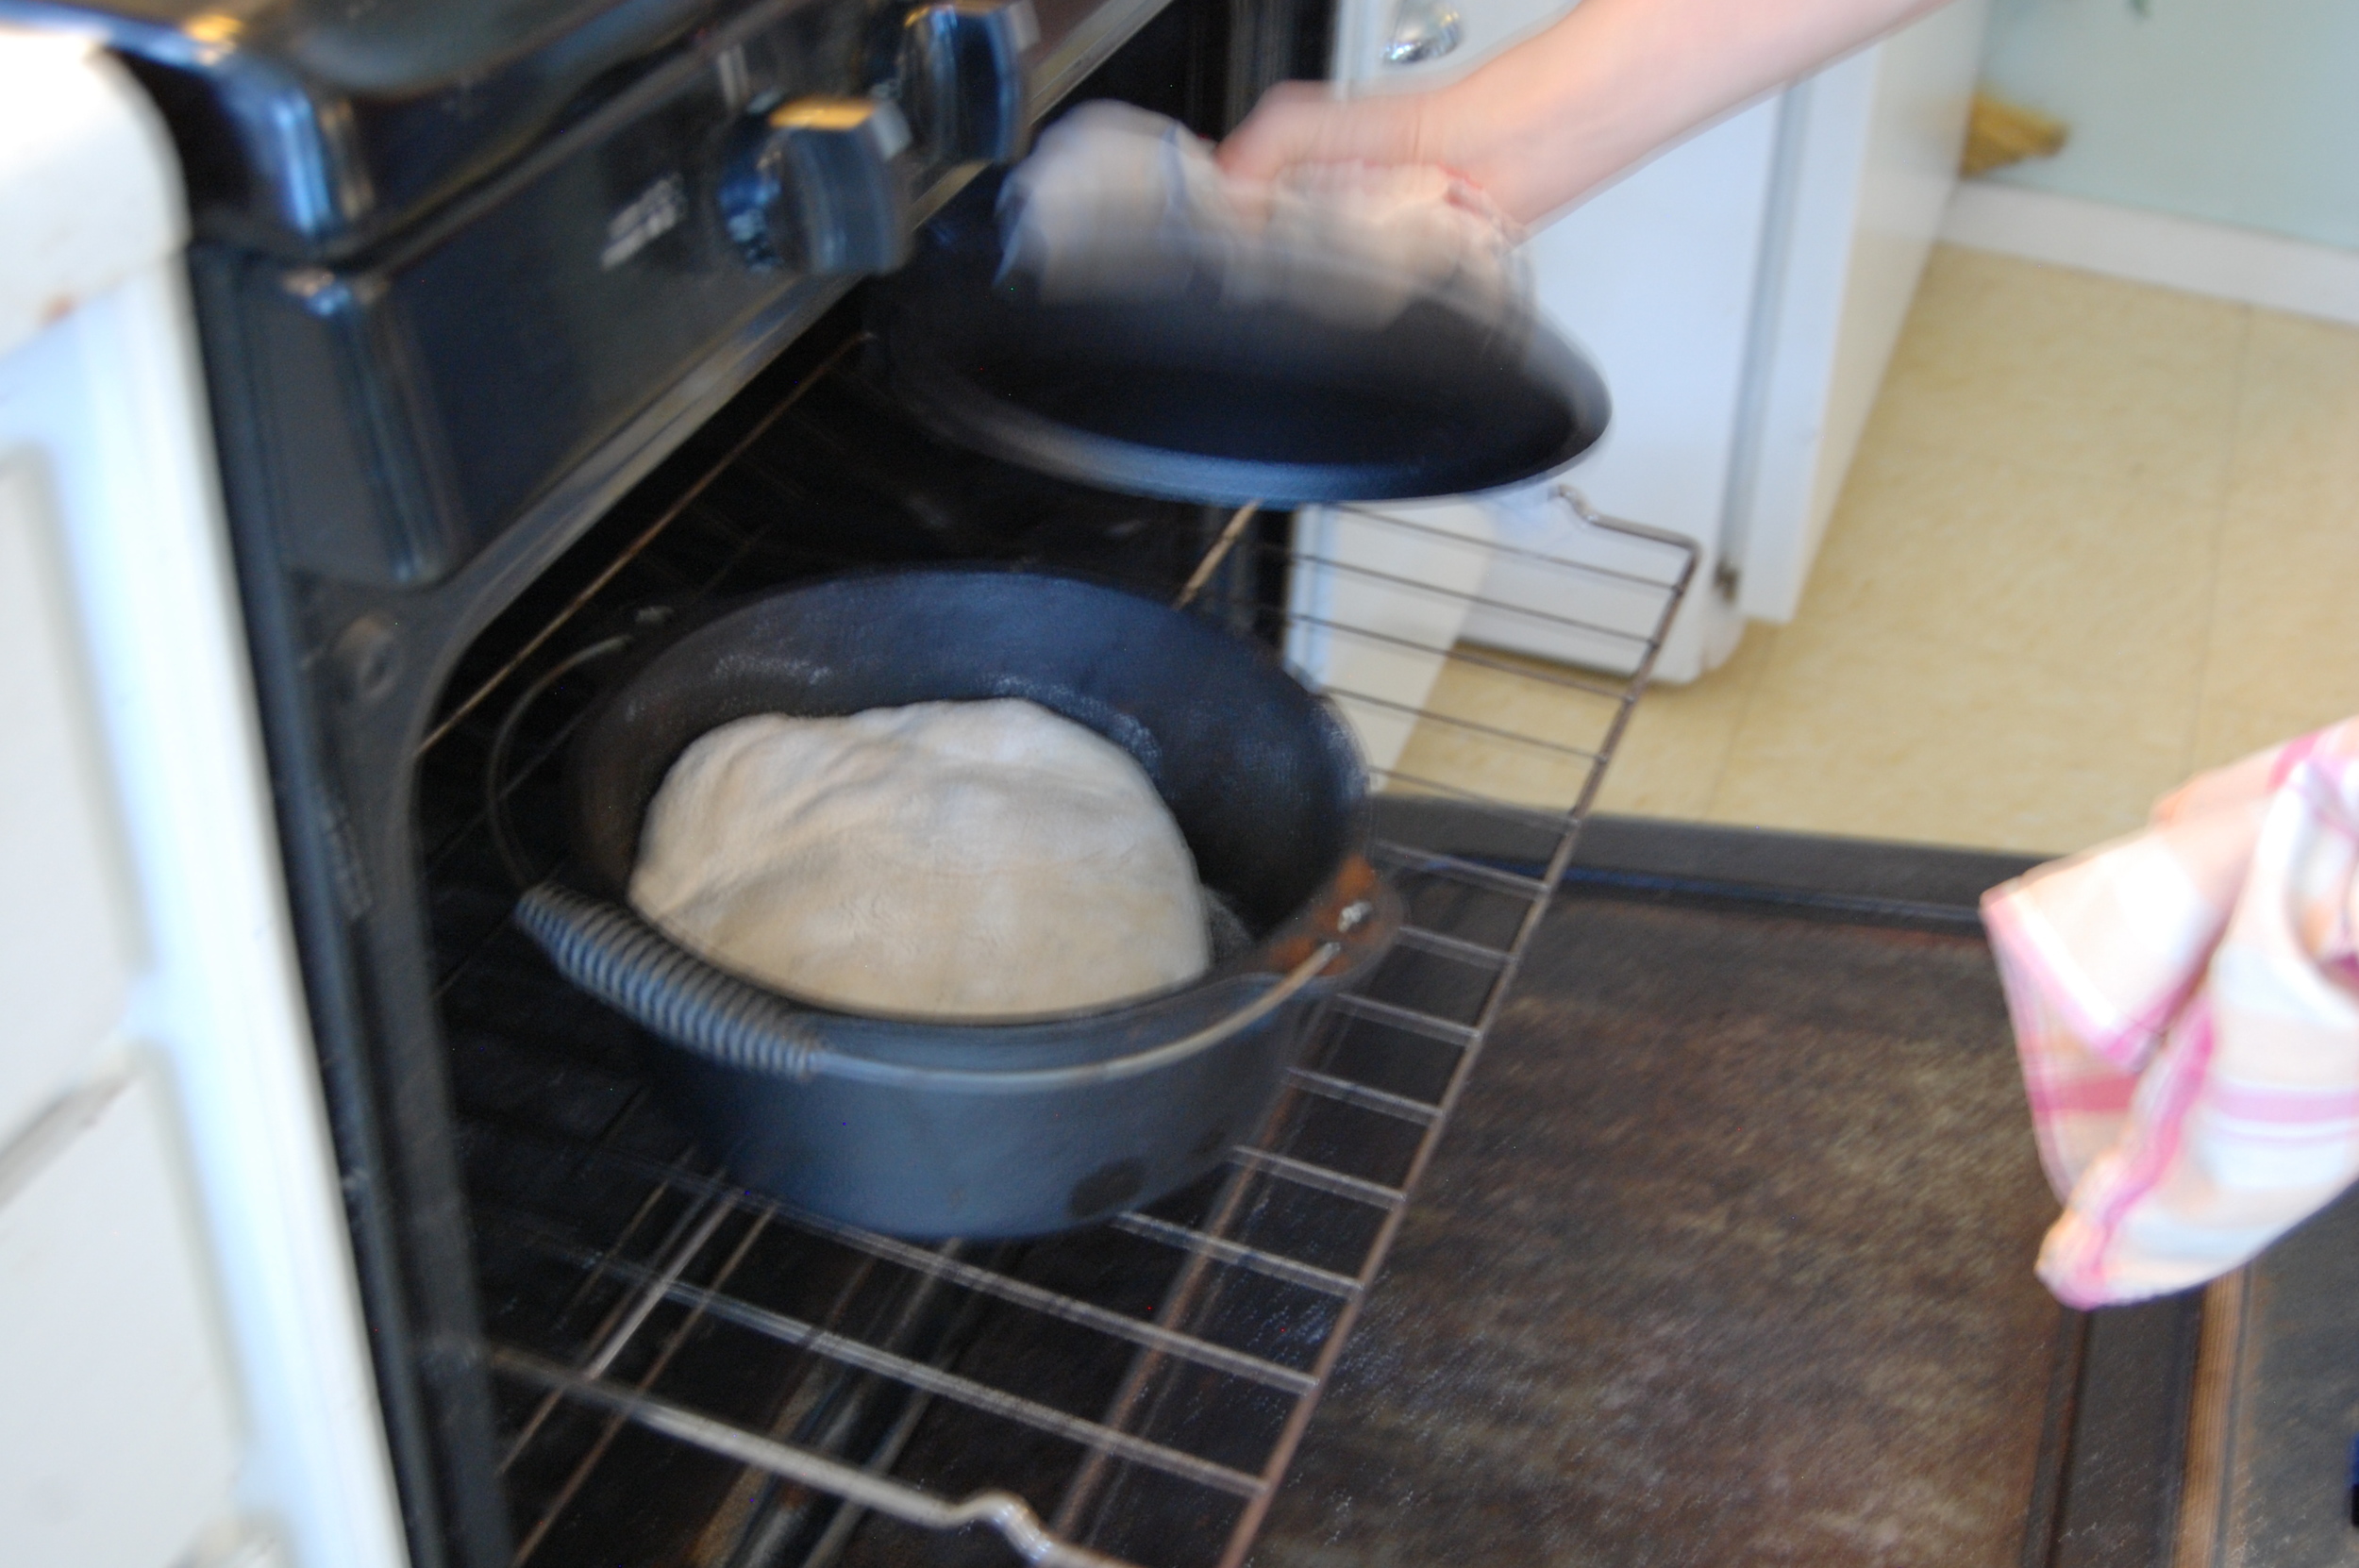
Bake, covered for 25 minutes.
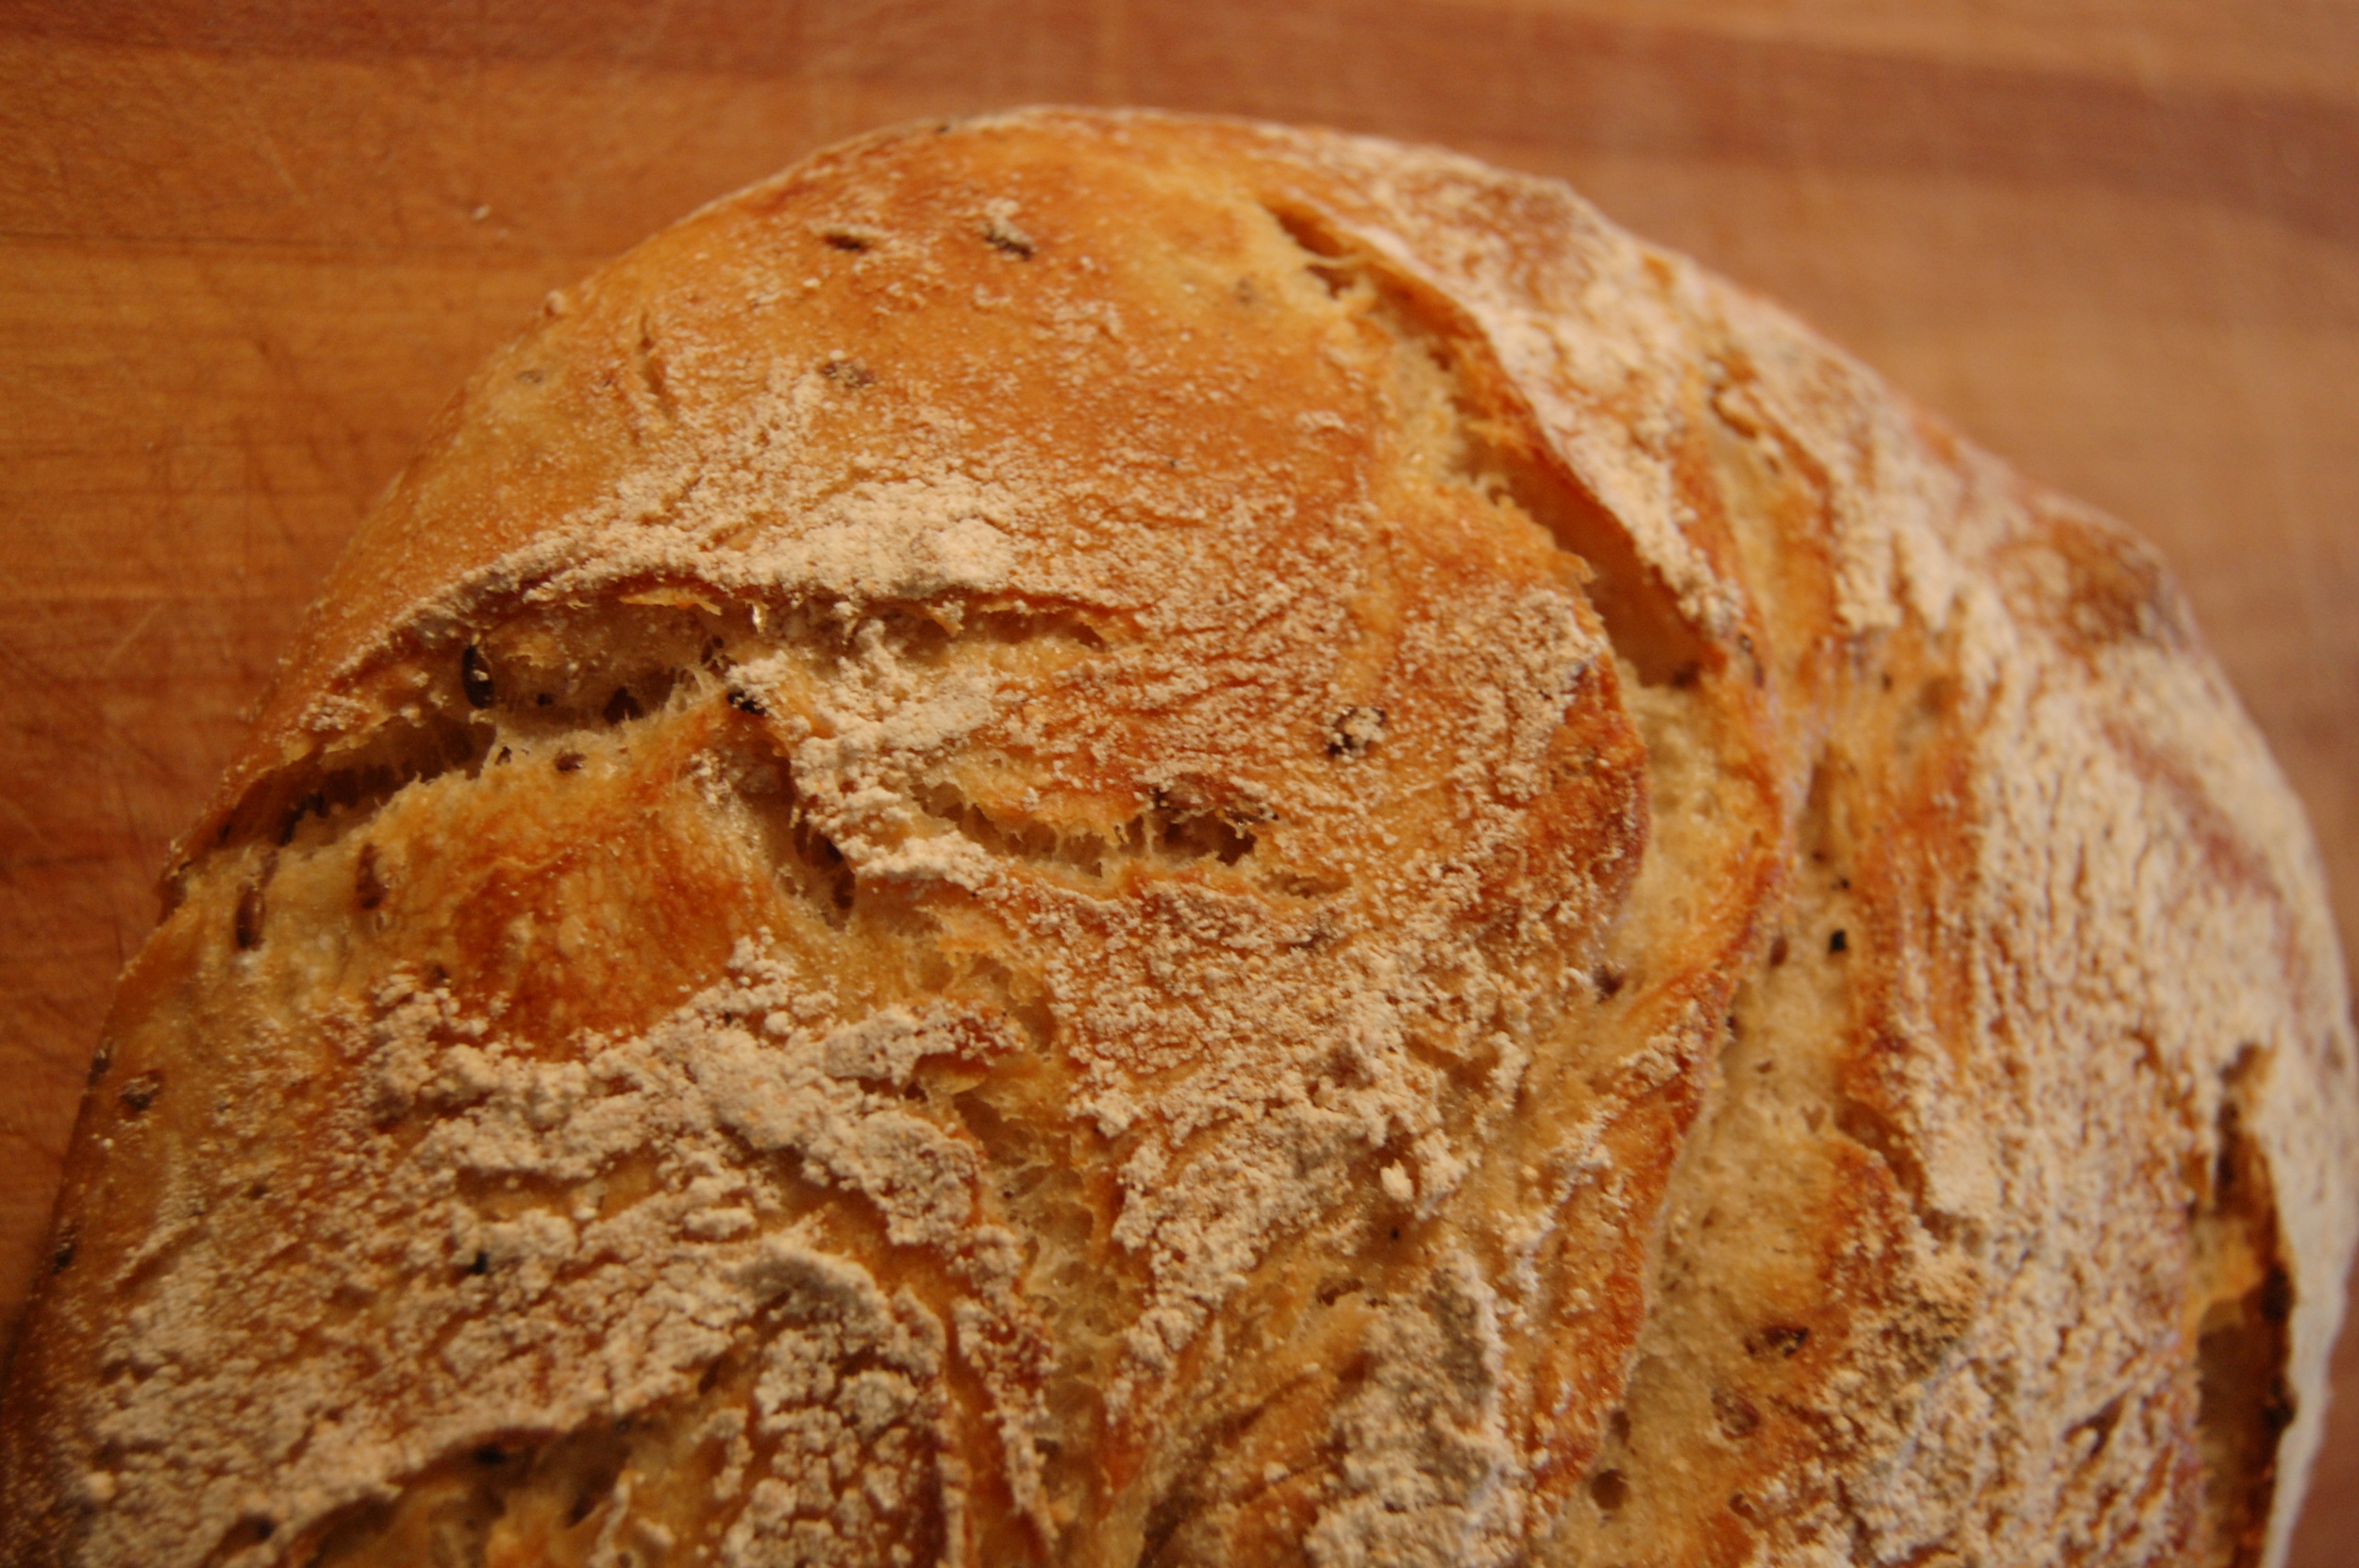
Next, remove the lid, and bake uncovered another 15 minutes until nice and brown. Will says always bake it until it's nice and brown (for a european-style thick crust) - he's right. Don't chicken out and remove it too soon.
You may have to experiment with the length of baking time. I am baking in high altitude (though I've baked it the exact same way in Arizona and it was perfect). If you are at a lower elevation, perhaps try to bake yours for 20 minutes covered, and another 10 uncovered. Also, adjust the time if you make a smaller loaf. My sister tried hers on convection bake the first time (in Texas) and it burnt and stuck to the pan. Don't bake it on a convection setting. Also, be sure to season your dutch oven before baking (even if it says it's pre-seasoned).
It looks amazing! But there's one LAST step.... it's probably the hardest:
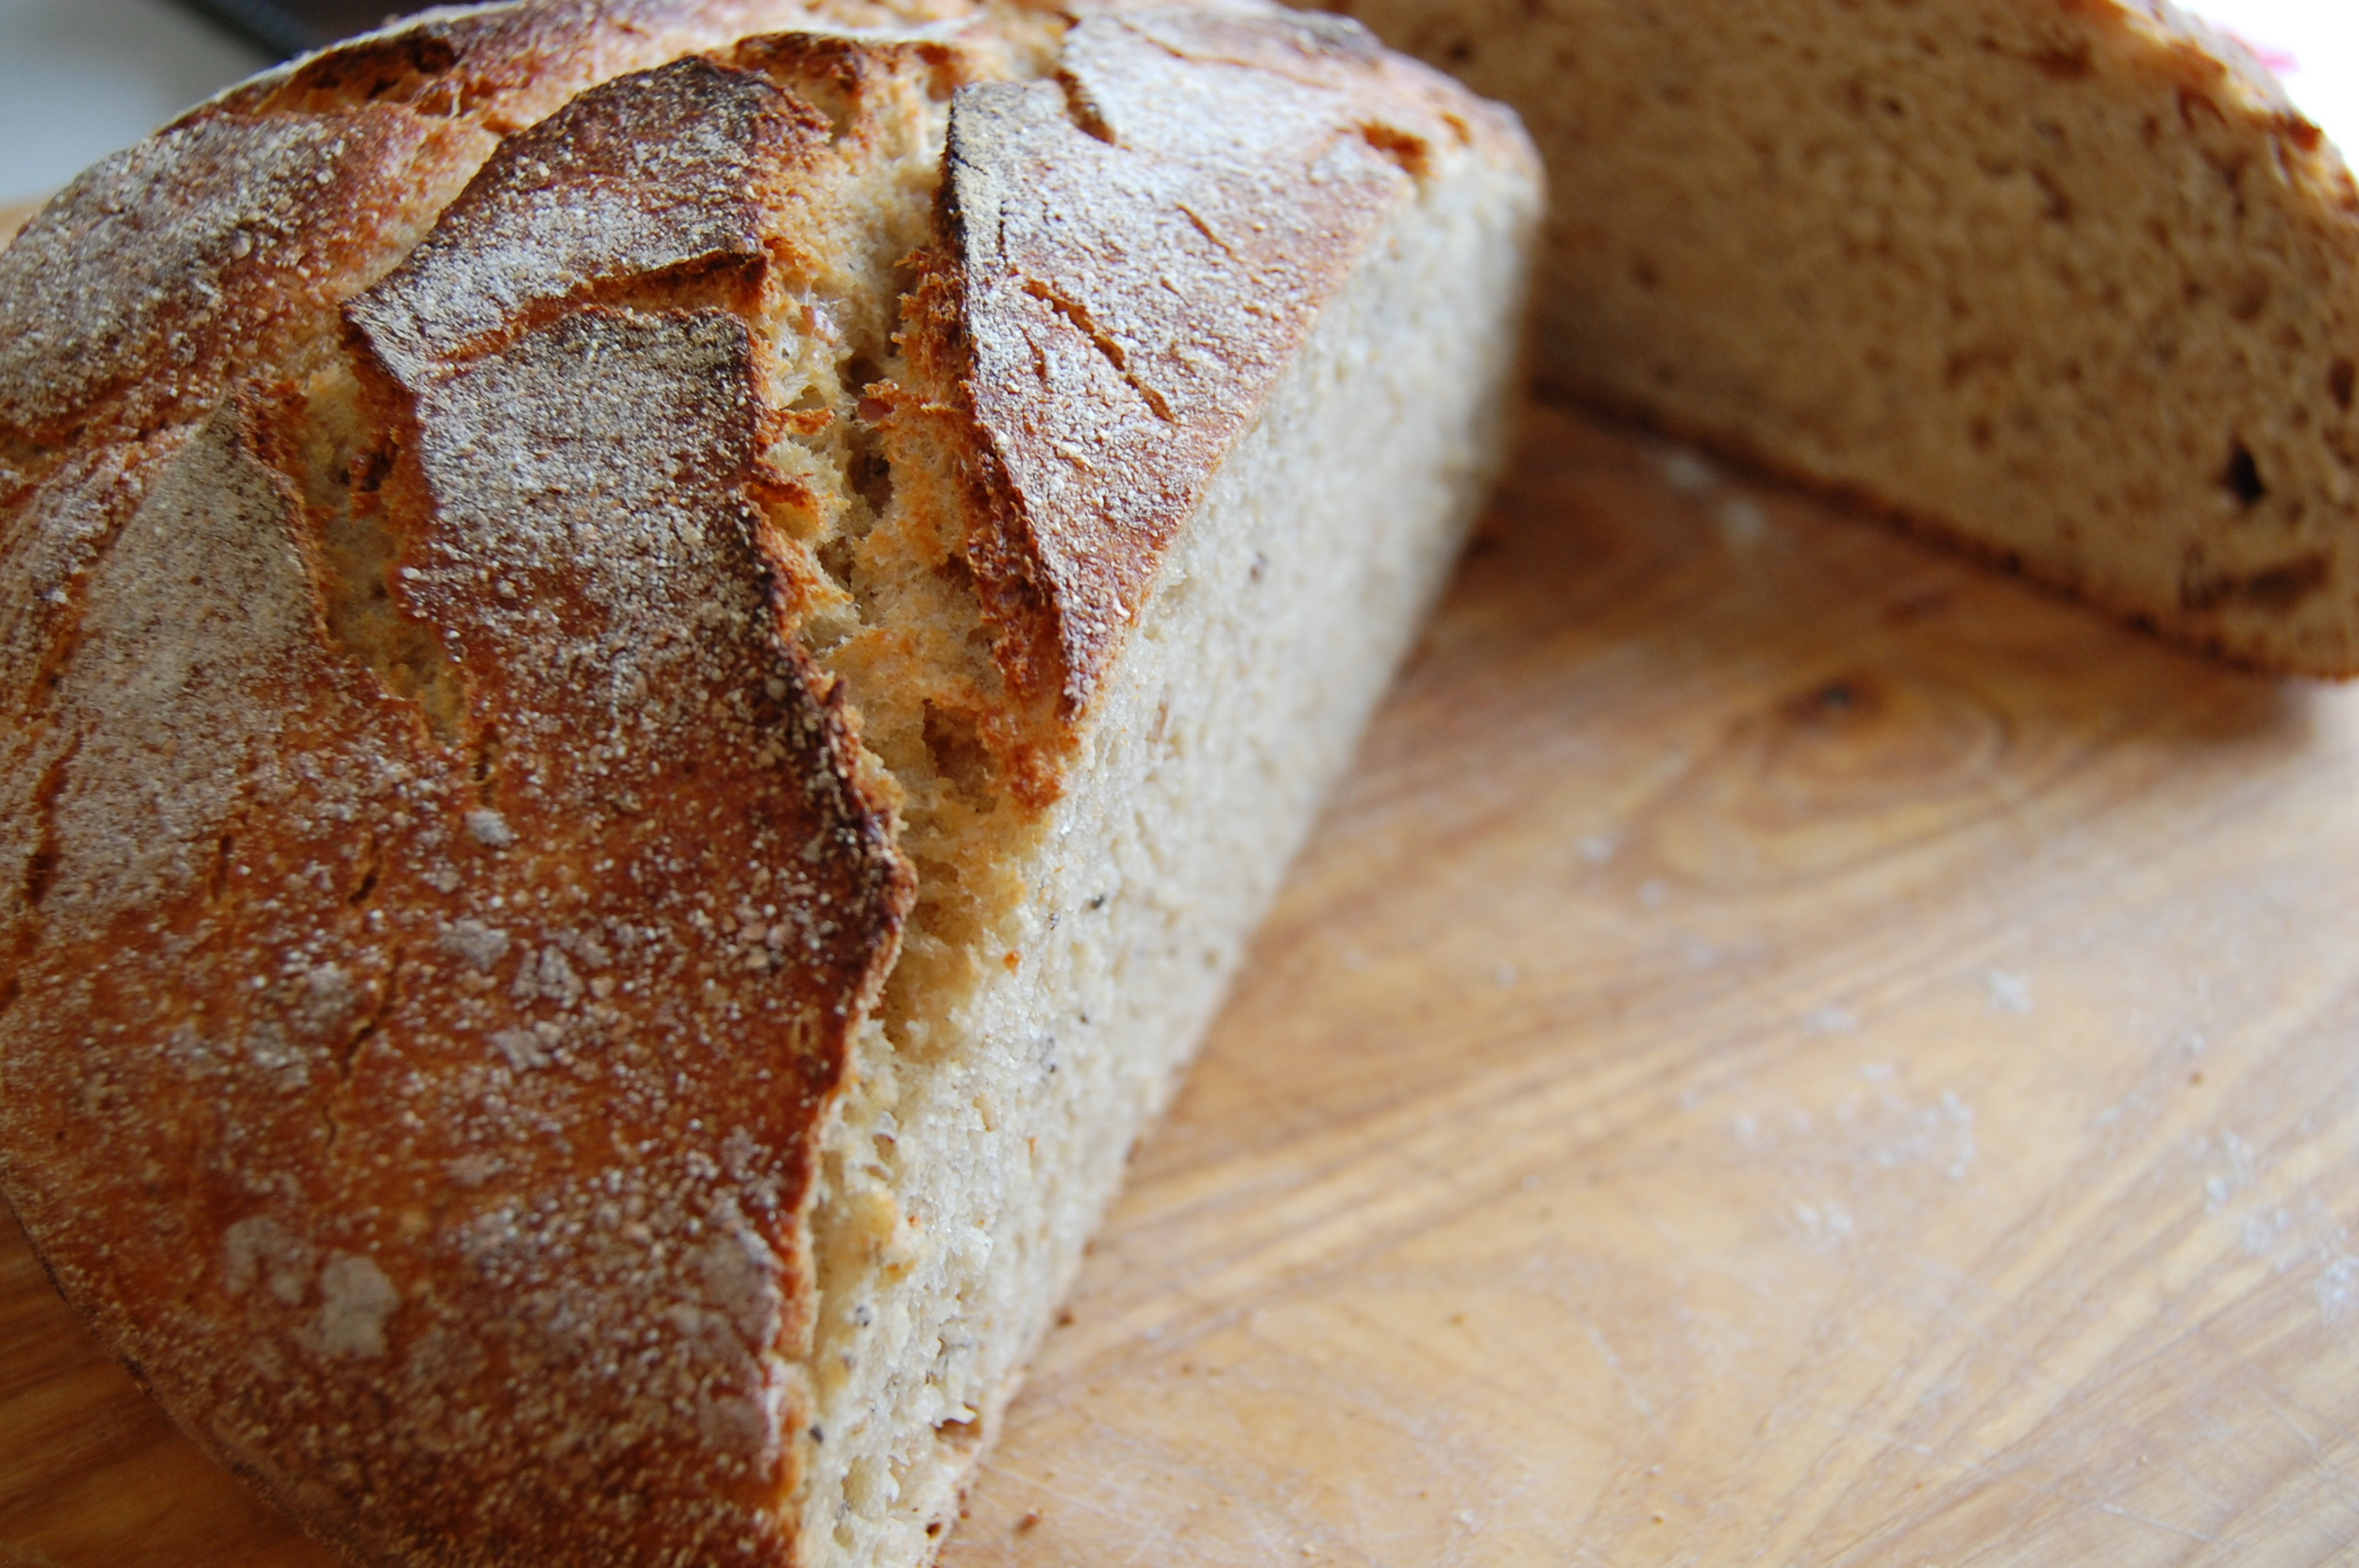
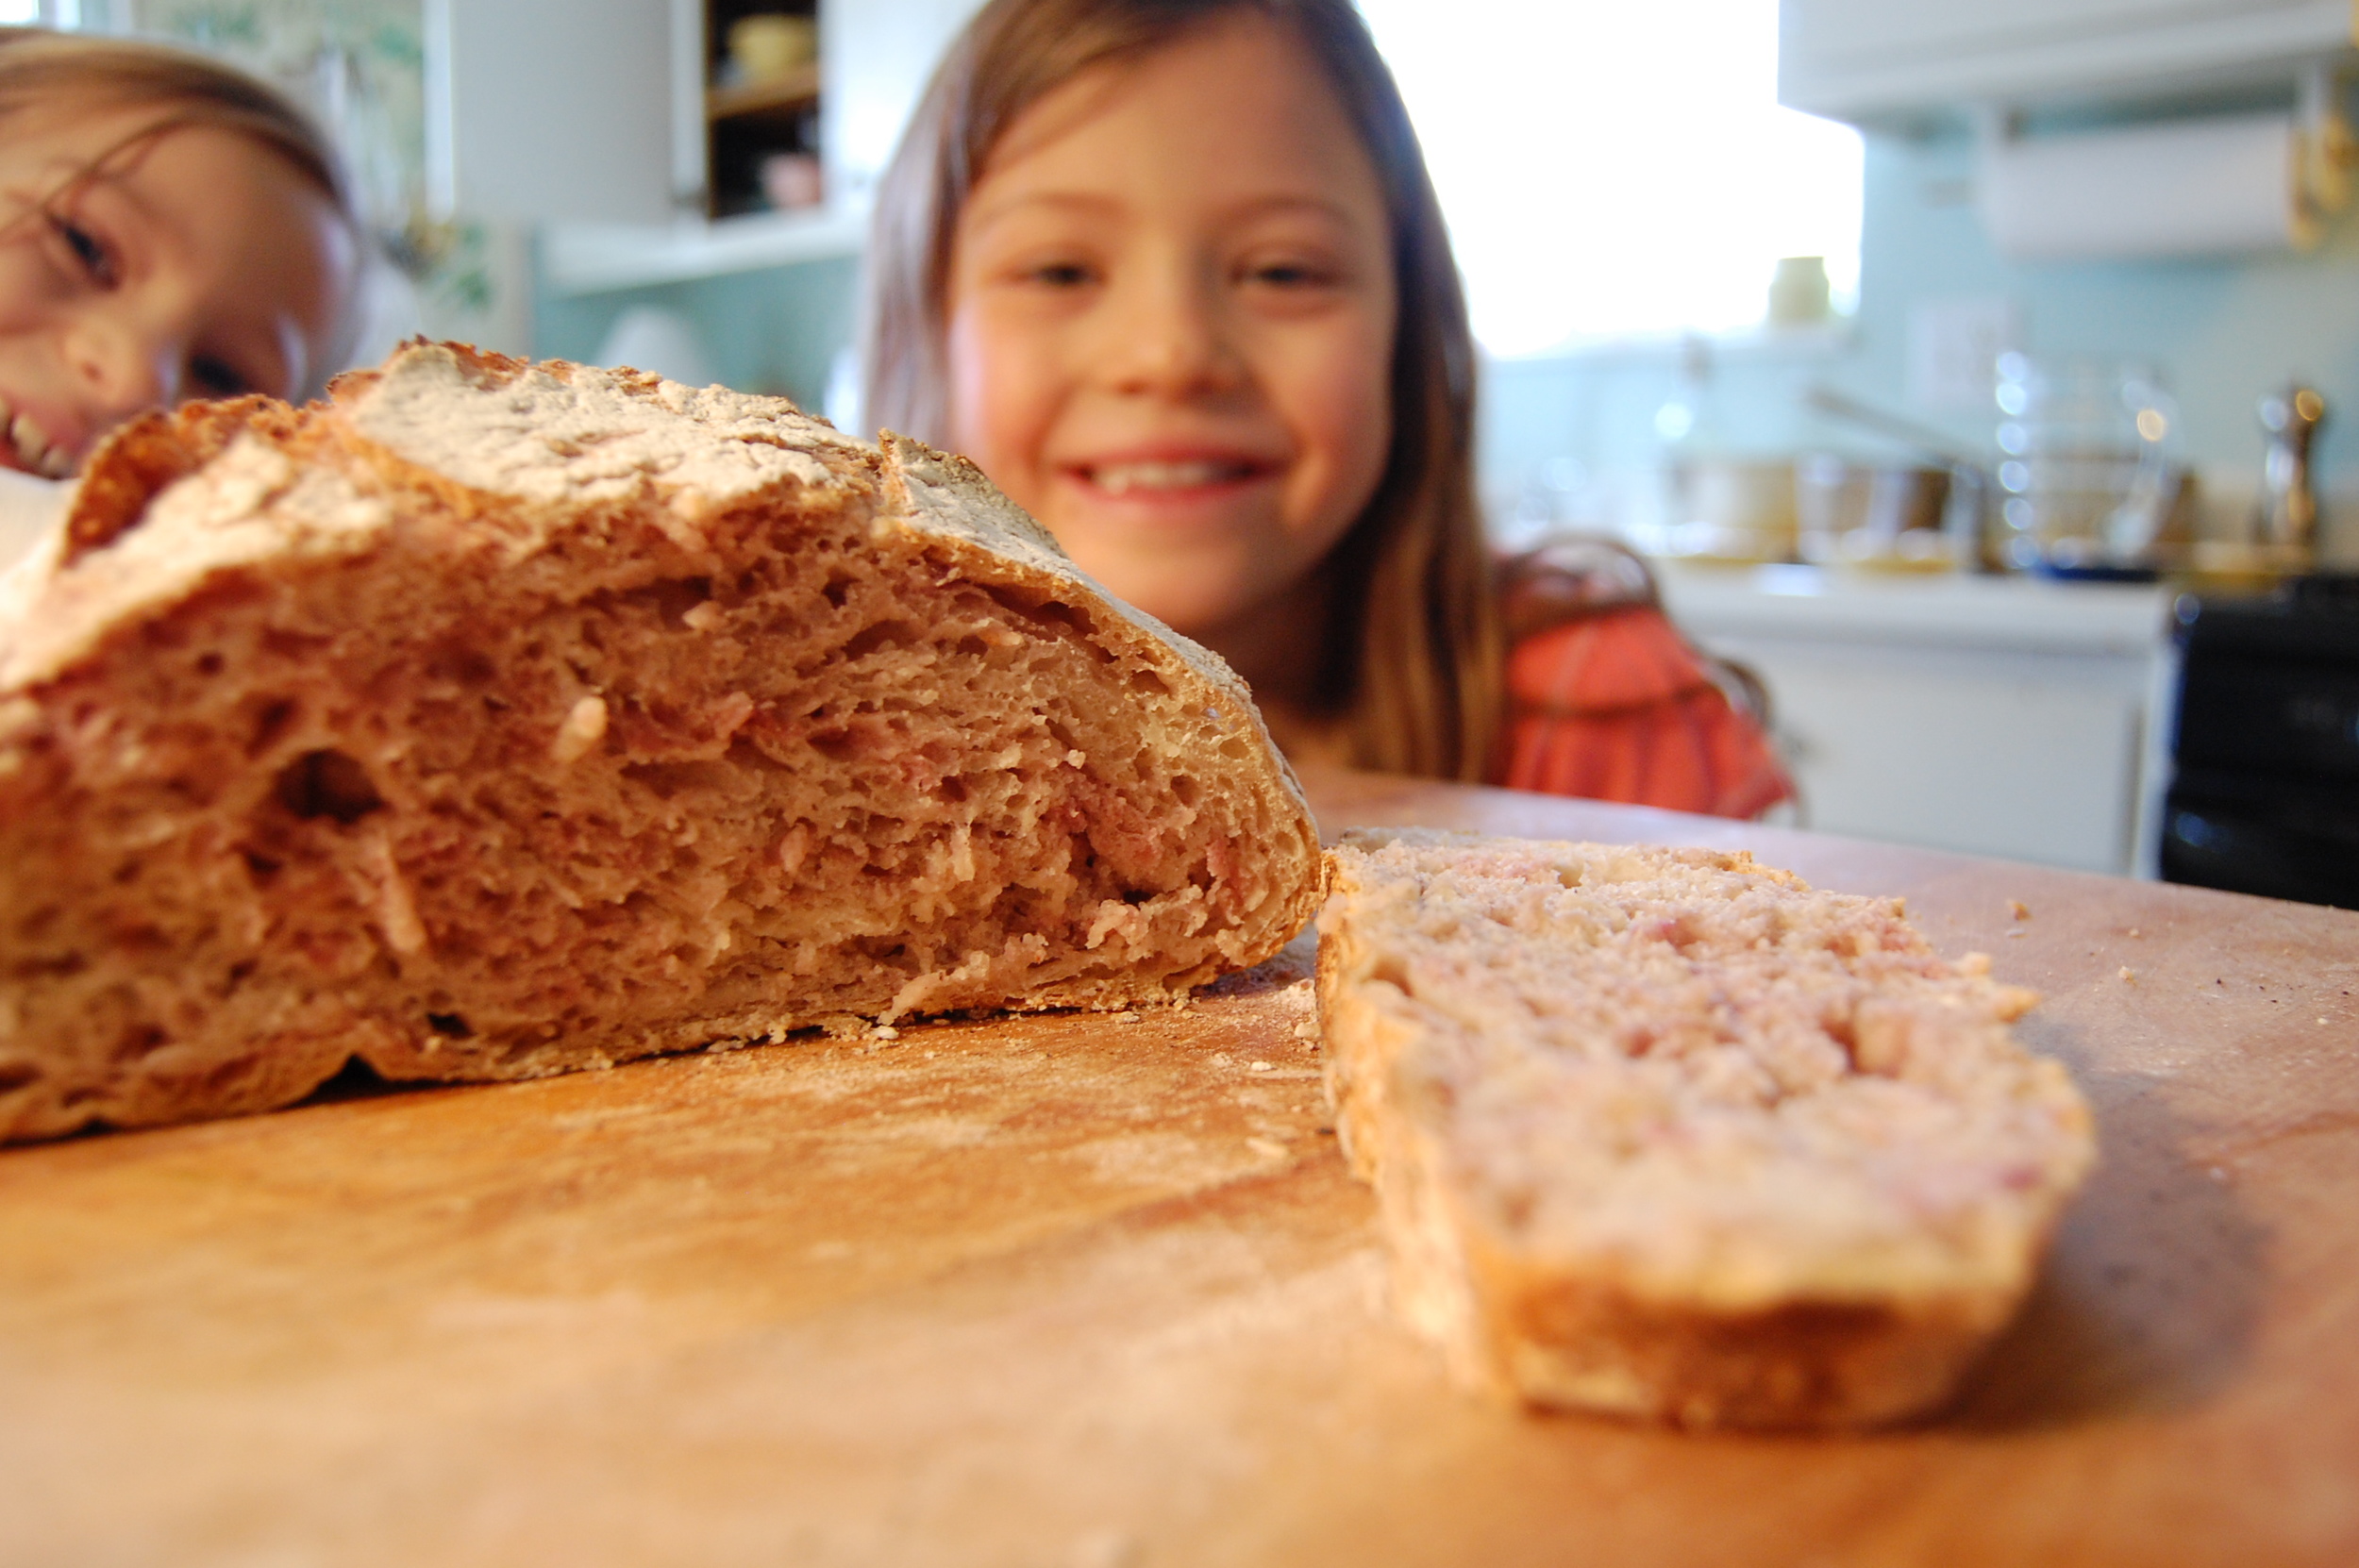
WAIT 15 MINUTES BEFORE CUTTING INTO IT.
I know, I know. The aromas are wafting. Everyone is excited. The loaf looks beautiful. The soup is ready. But wait. The steam is still cooking those moist inner layers, and the loaf will still be warm after you wait 15 minutes. If you cut in too soon, the middle will be too soft.
Once you get the process down, you can start adding in herbs, garlic, sweet and tart things... the possibilities are endless. Just remember - if you add dried things or seeds - that will absorb moisture - adjust the water by adding a bit more. If you add in frozen berries or fresh apples, that will release moisture - so add a bit less. Easy peasy.
You can start with using just the bread flour, too - it will yield an amazing, airy texture, though you'll miss the nuttiness of the whole wheat:

I like using half whole wheat for the flavor and nutrition benefit. As long as you use at least half bread flour, you'll get nice rise.

ALRIGHT FOLKS.
I have a video for you.
It's adorable - because my daughters are teaching and showing you how to bake sourdough. It's not the best because their Mom took the video and edited it herself. It's small and not super clear because I took it on my phone - but I still thought you'd enjoy seeing it done in person.
I hope you enjoy trying this wonderful bread. I am not exaggerating when I say that it's probably my MOST favorite thing I've EVER learned to cook in the kitchen. SO rewarding and lovely to look at. Please let me know if you try it!